A Step by Step Guide to Making a T-Shirt Quilt
I’ve talked about how making my third t-shirt quilt and accumulating lots of scrap fabric motivated me to re-make the first big sewing project I ever completed. It took me six weeks to deconstruct and reconstruct my quilt but I am happy to say that it’s finished. This post is a more detailed step-by-step breakdown of the making-of process and I includes some tips and the tools I used throughout. Because I haven’t done much traditional quilting, I want to be sure I’m being as clear as possible. Here are terms I frequently use in this post and what I they mean to me:
Scrap patch: many small pieces of patterned fabric, improv pieced together
T-Shirt square: A singular t-shirt block
Block: A combination of singular t-shirts sewn together, or t-shirts and scrap patches
Section: A bunch of blocks sewn together. Sections are sewn together to finish the quilt top
I tend to say quilt improvisation but this is synonymous with crumb quilting and improv piecing.
Scroll to the end of this post for a photo gallery. I also made a video about this whole process which you can watch on YouTube!
Phase 1: Deconstruction
I knew I wanted to re-use the t-shirts in my original quilt, rather than making a second t-shirt quilt for myself. So for me, the first step in making a t-shirt quilt was taking apart my old one, which took place in three steps.
Step 1: Remove the binding. The binding finishes the raw edges of the quilt and is attached to both the front and backside. For most of the binding, I used a seam ripper because I wanted to preserve as much of that fabric as possible in order to re-use it. At some points, when stitches were very tight, particularly on the binding, I used scissors with a sharp and tiny point to cut through that section.
Step 2: Undo the top stitches. The top stitches run in the ditches of my quilt top. They hold the quilt layers together and create the quilted effect.
Step 3: Separate the t-shirt patches into individual squares. These t-shirt squares are the building blocks for the new top. I used the seam ripper when I needed to preserve as much fabric as possible-- for most of the binding, when seams ran close to or on top of graphics. For graphics that had lots of negative space on the sides, I used my rotary cutter and mat to create a new patch, which was quick and efficient. Something I’m always looking for.
Phase 2: Prepare Materials
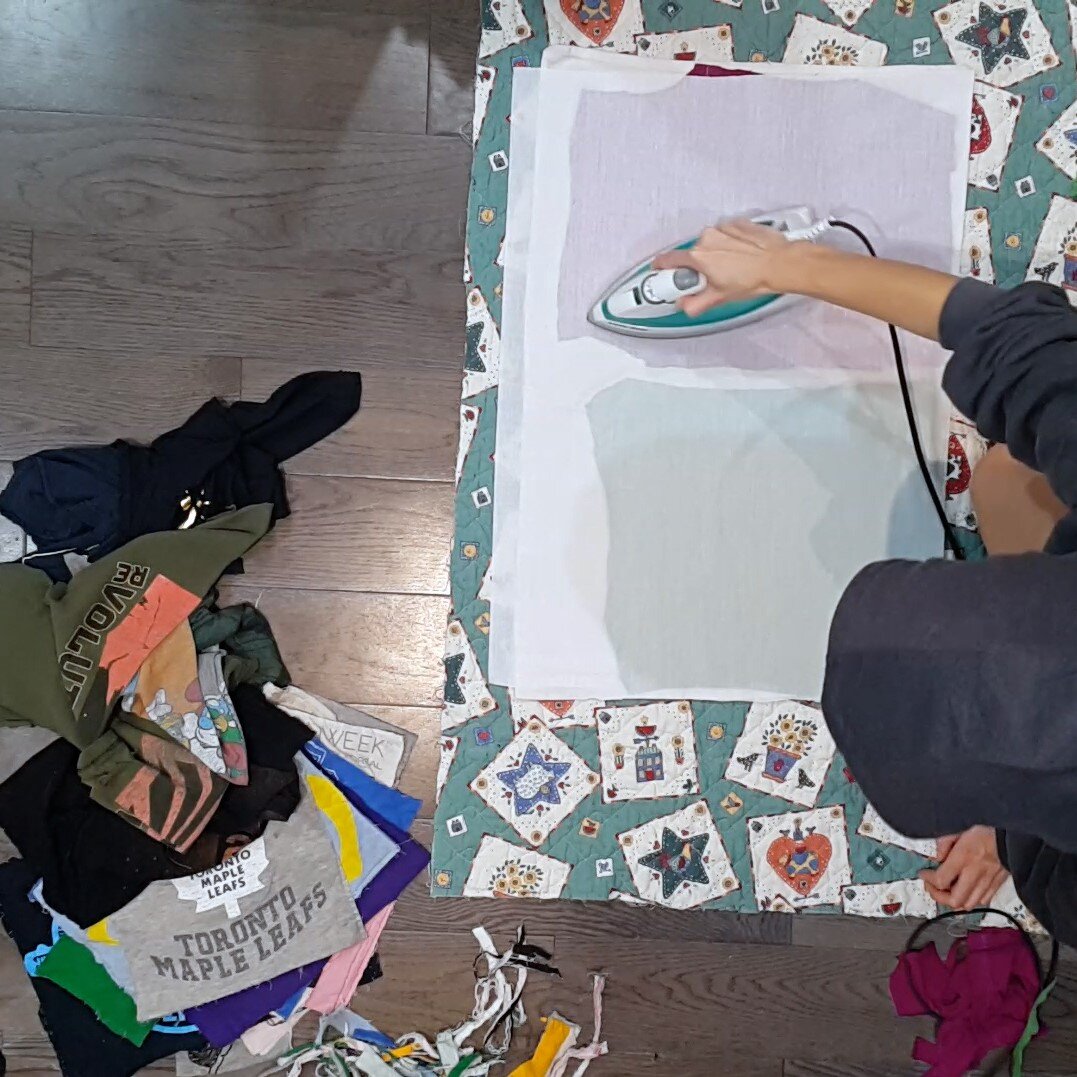
Step 4: Interface t-shirts. A really important step in preparing the t-shirts for quilting is to interface them so they no longer stretch. I went through my drawers, found a bunch of t-shirts to interface, and prepped those for sewing.
TIP: If you don’t have the right size of interfacing, you can assemble smaller pieces on the back of your material as long as most of the fabric is covered, especially the edges.
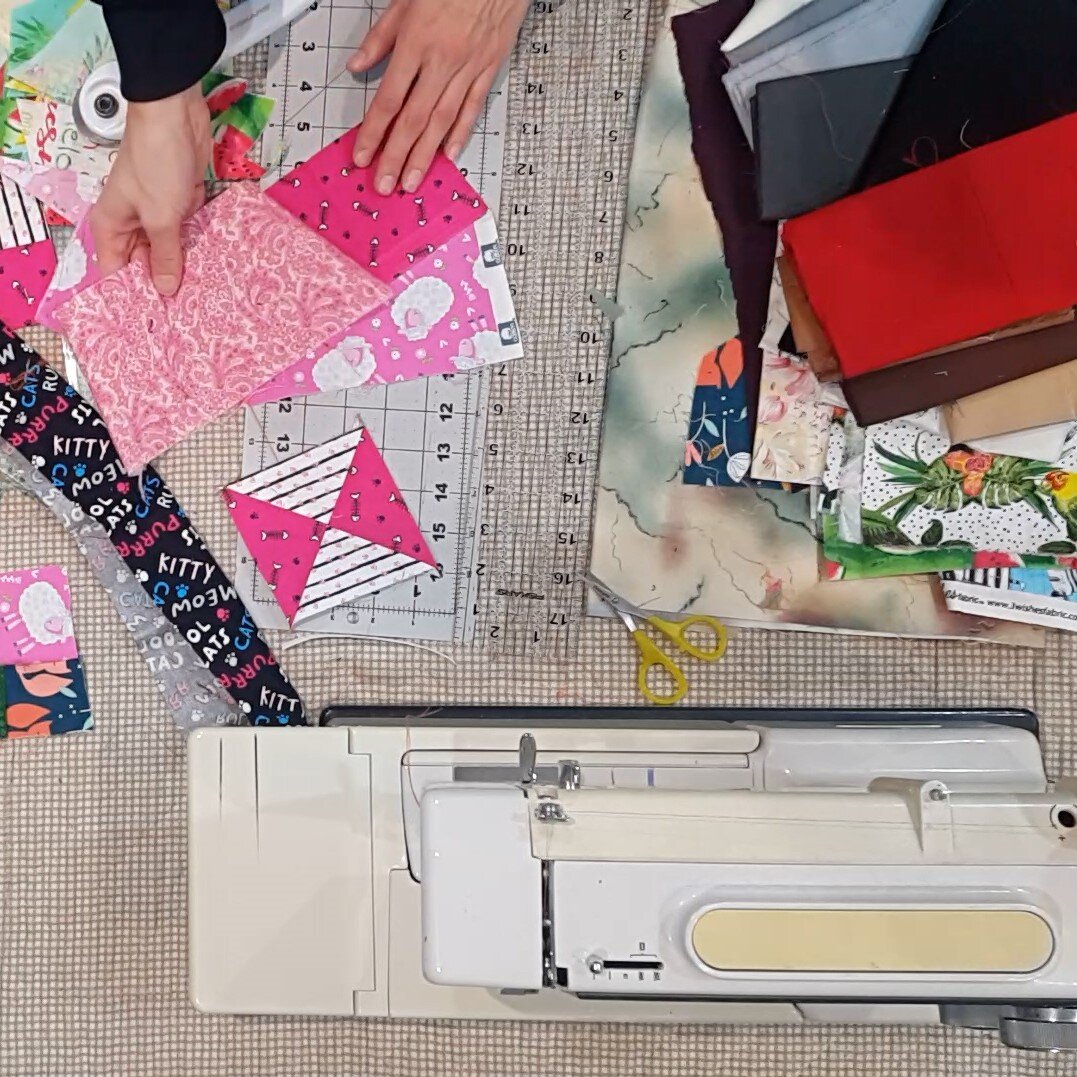
Step 5: Quilt improvising with scrap fabric. Once the t-shirts were interfaced, I focused on preparing additional fabric blocks from scrap fabric to fill gaps in my quilt. I grabbed my scraps and some supplemental fabric from my stash and began to sew. This process is made much easier by a clear ruler, right angle triangle, rotary cutter, and mat.
Phase 3: Design and Sew
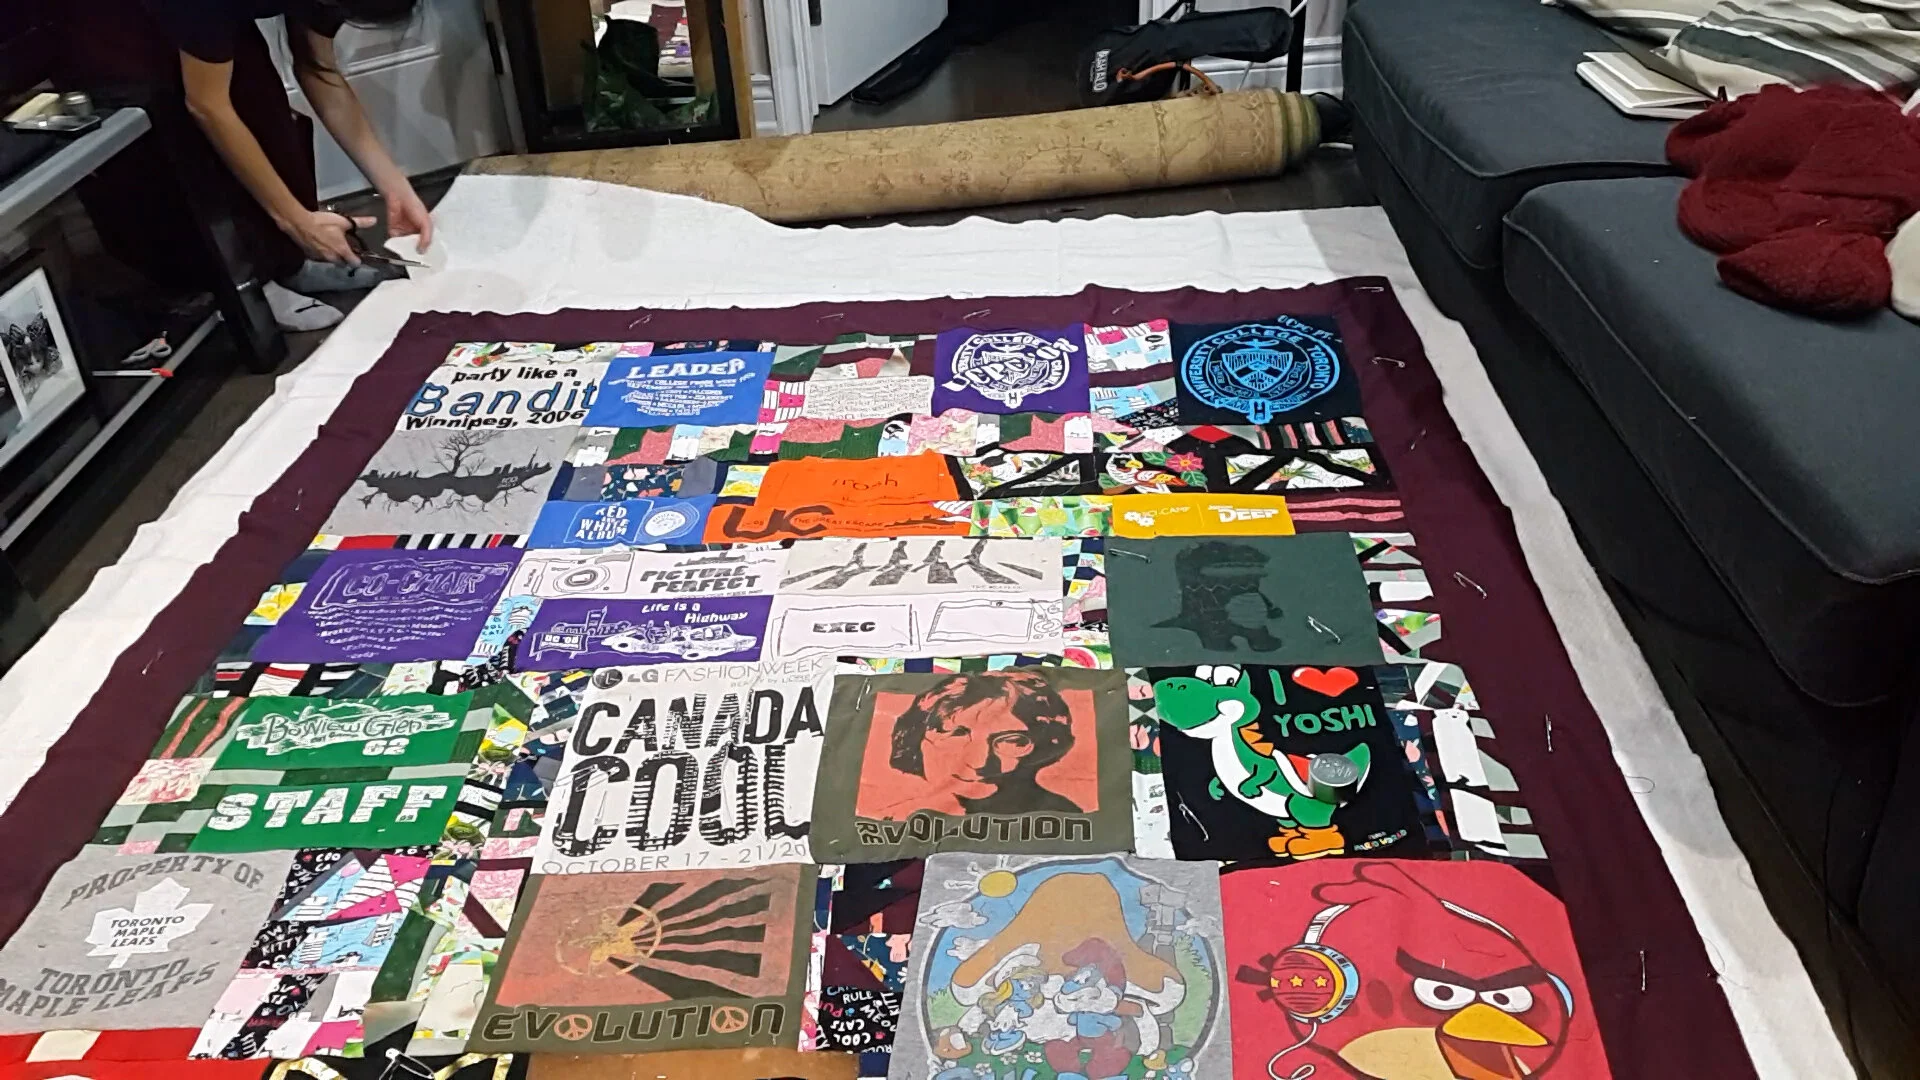
Step 6: Plan Quilt Top Layout. When deciding on any t-shirt quilt layout, I organize the blocks into themes or groupings - are there t-shirts that belong together. Is there a chronological order? Are there repeat colours?
Step 7: Sew Quilt Top Together. After double checking the layout, I stitch together the quilt front.
TROUBLESHOOTING: It’s easiest to sew straight seams, so I look to sew the quilt top together in sections that I can easily line up. For the most part, I was able to work in rectangular sections and sew straight seams. However, there were a few areas that weren’t perfectly rectangular. As a result, some corners didn’t line up exactly and there was excess fabric that needed to be removed or carefully folded into the seam allowance. In these cases, I find that hand sewing patches together, using an applique stitch, can help ease things together.
When sewing pieces together, especially when they are particular long, I find using a straight edge (like a t-square) and clips help hold things together and aligned.
Step 8: Add a border. Once all of the patches were together, it was time to finish up the quilt top by addressing a major missing component -- a border. I used a dark purple fabric throughout my scrap patches and had enough of it to put a substantial 12 centimetre (5 inch) border around all sides.
Phase 4: Quilting
Step 9: Cut the batting and back layer. After sewing the borders, the quilt really starts looking good. Now it’s time to re-measure the entire quilt top size and cut out the batting layer and back fabric to size. I cut both of these layers to be wider and longer than the quilt top, at least 2-3 inches on every side.
NOTES AND TIPS:
Batting comes in a variety of fibre types. I am using a cotton-poly blend because 100% cotton was very expensive). It is easy because it comes in one large piece.
The back is 100 percent cotton flannelette. It’s thicker than a quilting cotton but not as fuzzy as a flannel.
If the width of the backing fabric is shorter than any of your quilt sides, you will need to sew two pieces together. If you are using a fabric with a pattern, excess yardage so that you can match the pattern is a good idea. This is for aesthetic purposes only; it helps the back fabric appear like one seamless length of fabric.
Be sure to cut out the seam allowance after you pattern match so as not to add any additional bulk to the quilt.
Step 10: Secure quilt sandwich. Once all three layers were cut down to size, I prepped the quilt for quilting. Using a combination of T-pins and safety pins, I attached all three layers together. At this stage, the more pins the better as this will prevent the layers from shifting a part as you move the quilt through your sewing machine.
TIP: Additional inches of batting and backing fabric will allow me to smooth out any puckers in the fabric to the edges and still keep all three layers together.
Step 11: Quilt. I always start quilting the centre seams of my quilt, working towards the edges. This reduces puckering or bunching in the quilt top and helps things lie flat. Before I bring my quilt to my machine, I look at the middle of my quilt and identify the longest seams running from top to bottom and left to right. Once I stitch these seams, I sew the adjacent seam next, smooth out any wrinkles to the edges as I go.
TIPS:
Because I pieced together irregularly sized sections, there isn’t a seam line that runs the entire length or width of this quilt but I look for the longest seams running in both directions.
I like to alternate between top stitching horizontally and vertically to prevent twisting.
A walking foot helps with this step, though this machine does *not* have one, so it’s not absolutely necessary. If you don’t have one, just be patient and go slow.
I strategically place chairs around my sewing table to help prop my quilt up. It can be hard to move a quilt through a machine, especially if you don’t have a walking foot.
Phase 5: Finishing
Step 12: Cut loose threads and remove any remaining pins. These are the small finishing details. There are no doubt loose threads from your quilting, and despite my best efforts, I’ll always find a pin or two in the quilt even if I think I’ve gotten them all.
Step 13: Trim your sandwich and bind the quilt. The quilt sandwich needs to be trimmed down so that all three layers match. I have used binding of various widths, but two and a quarter to two and a half inches is common. I have made my own binding but also bought pre-made binding too.
I tried machine binding both the front and back of the binding. I really didn’t like the way it looked so I re-did it. I like the way the binding is finished when it is machine bound to the front of the quilt and the hand sewn to the back.
Reflection
I don’t know if it was the satin material or the foot that I used but the fact that I finished machine binding the entire quilt only to realize that I didn’t like it at all made me so upset. After years of thinking about how I’d improve this quilt and working on this quilt for six weeks, I was disappointed to have stumbled so close to the finish line. When I finished, I expected to have a great sense of satisfaction and it took a few days and some reflection to feel good about everything. I had to remind myself of how much work I had done, and that I addressed all of the things (size, a border, and better materials) that I wanted to address.
In addition to my quilt, I gained a couple of creative insights:
I learned that I really enjoy quilt improvising and I want to push myself to use this technique in other applications and projects.
Up until this point, I have avoided tackling my biggest challenge when it comes to t-shirt quilts -- planning and design. So far, I’ve come up with all sorts of tips to deal with wonky patches and irregular corners but I now realize that the next level requires a better plan and precise measurements earlier. Like traditional quilts, a good plan is key to perfecting the finish details, and a more polished looking quilt is my next goal.
Making a quilt is a big undertaking so I’m going to choose a smaller project from my list to work on next.