What I Learned From Making T-Shirt Quilts
I am sure that all of us own a t-shirt that is perfect for a quilt patch. Whether that is:
the event t-shirt - from that once-in-a-lifetime, never-to-be-forgotten group birthday / concert / sporting event
a uniform - the shirt that says “staff” or “volunteer” on the back and “team building exercises ‘99” on the front
the logo - [reputable local business logo], [“go sports go” logo], [I paid for this with my own money Big Brand logo]
the phrase - “rise and grind those coffee beans”, “I woke up like this”, “maybe she was born with it, maybe it’s generational wealth”
a shirt that captures important cultural moment - North Over Everything a cat in space, a cat on a unicorn, cat
If you happen to accumulate enough of these, you can also make your own t-shirt quilt.


After accumulating many of these t-shirts myself, I decided that the best way to preserve these sentimental items was to repurpose them into something more useful than two drawers full of pajama shirts. It was a journey but once I finished my first t-shirt quilt, I quickly started and finished a second quilt for one of my brothers. I applied the (many) things that I had learned to that quilt — from preparation, to design, and finishing. Continue below for a collection of tips.
I moved my box of t-shirts around to two different apartments before I finally started to make my t-shirt quilt in preparation for a third move in four years. While stressed and overwhelmed, I decided that instead of moving my entire box of t-shirts, I’d save valuable space and weight by taking just the graphic part. Having no plan on how I wanted to lay my quilt out and only completing minimal research as to how to start the construction process, I began cutting out just the graphics. I was quite pleased with my compact stack of fabric. Turns out, it would have been much easier to just move a full box of complete t-shirts.
Anyways, after living in my new apartment for two years, I decided to finally start constructing my t-shirt quilt. I cannot remember the exact moment of inspiration; it could have been a desire to tidy up or an episode of Project Runway. I borrowed my mom’s sewing machine and actually, finally started to make this quilt. I hazily recalled the internet research I did when I set my t-shirts aside the first time and recall some best practices:
to pre-wash your fabric and
to interface knit fabric (a best practice confirmed by my mother).
So I proceeded to wash and then interface my fabric and here is what I learned. Assuming you are regularly doing your laundry after wearing your clothes, there is no need to pre-wash your t-shirts. If you are going to wash your t-shirts, do so before cutting them. I didn’t consider that my t-shirts, having been pulled from my drawer (prior to being cut), were already clean, and so I treated my pre-cut t-shirts as if they were new material and threw them into the washer and dryer. When I pulled them out, all of the edges had curled. This outcome is very obvious to me now but unfortunately at the time, I did not consider this defining characteristic of knit fabric. These curled edges made ironing on the interfacing more tedious and challenging. I repeat, if you want to give your t-shirts a good wash, do so before you cut them, so that the hem and side seams keep the edges from curling.
Fusible interfacing is a convenient invention. At the time of making this quilt, my basic understanding that stretchy materials were not appropriate for a quilt and that they needed to be more rigid. The words “knit” and “woven” were new to my vocabulary but thanks to my mom and the internet, the words “fusible interfacing” were too. This process, even with perfectly pristine t-shirts, is still time consuming and a bit tedious but the quality of the fabric is transformed into a sturdy piece of fabric that lays nice and flat and is easy to sew.
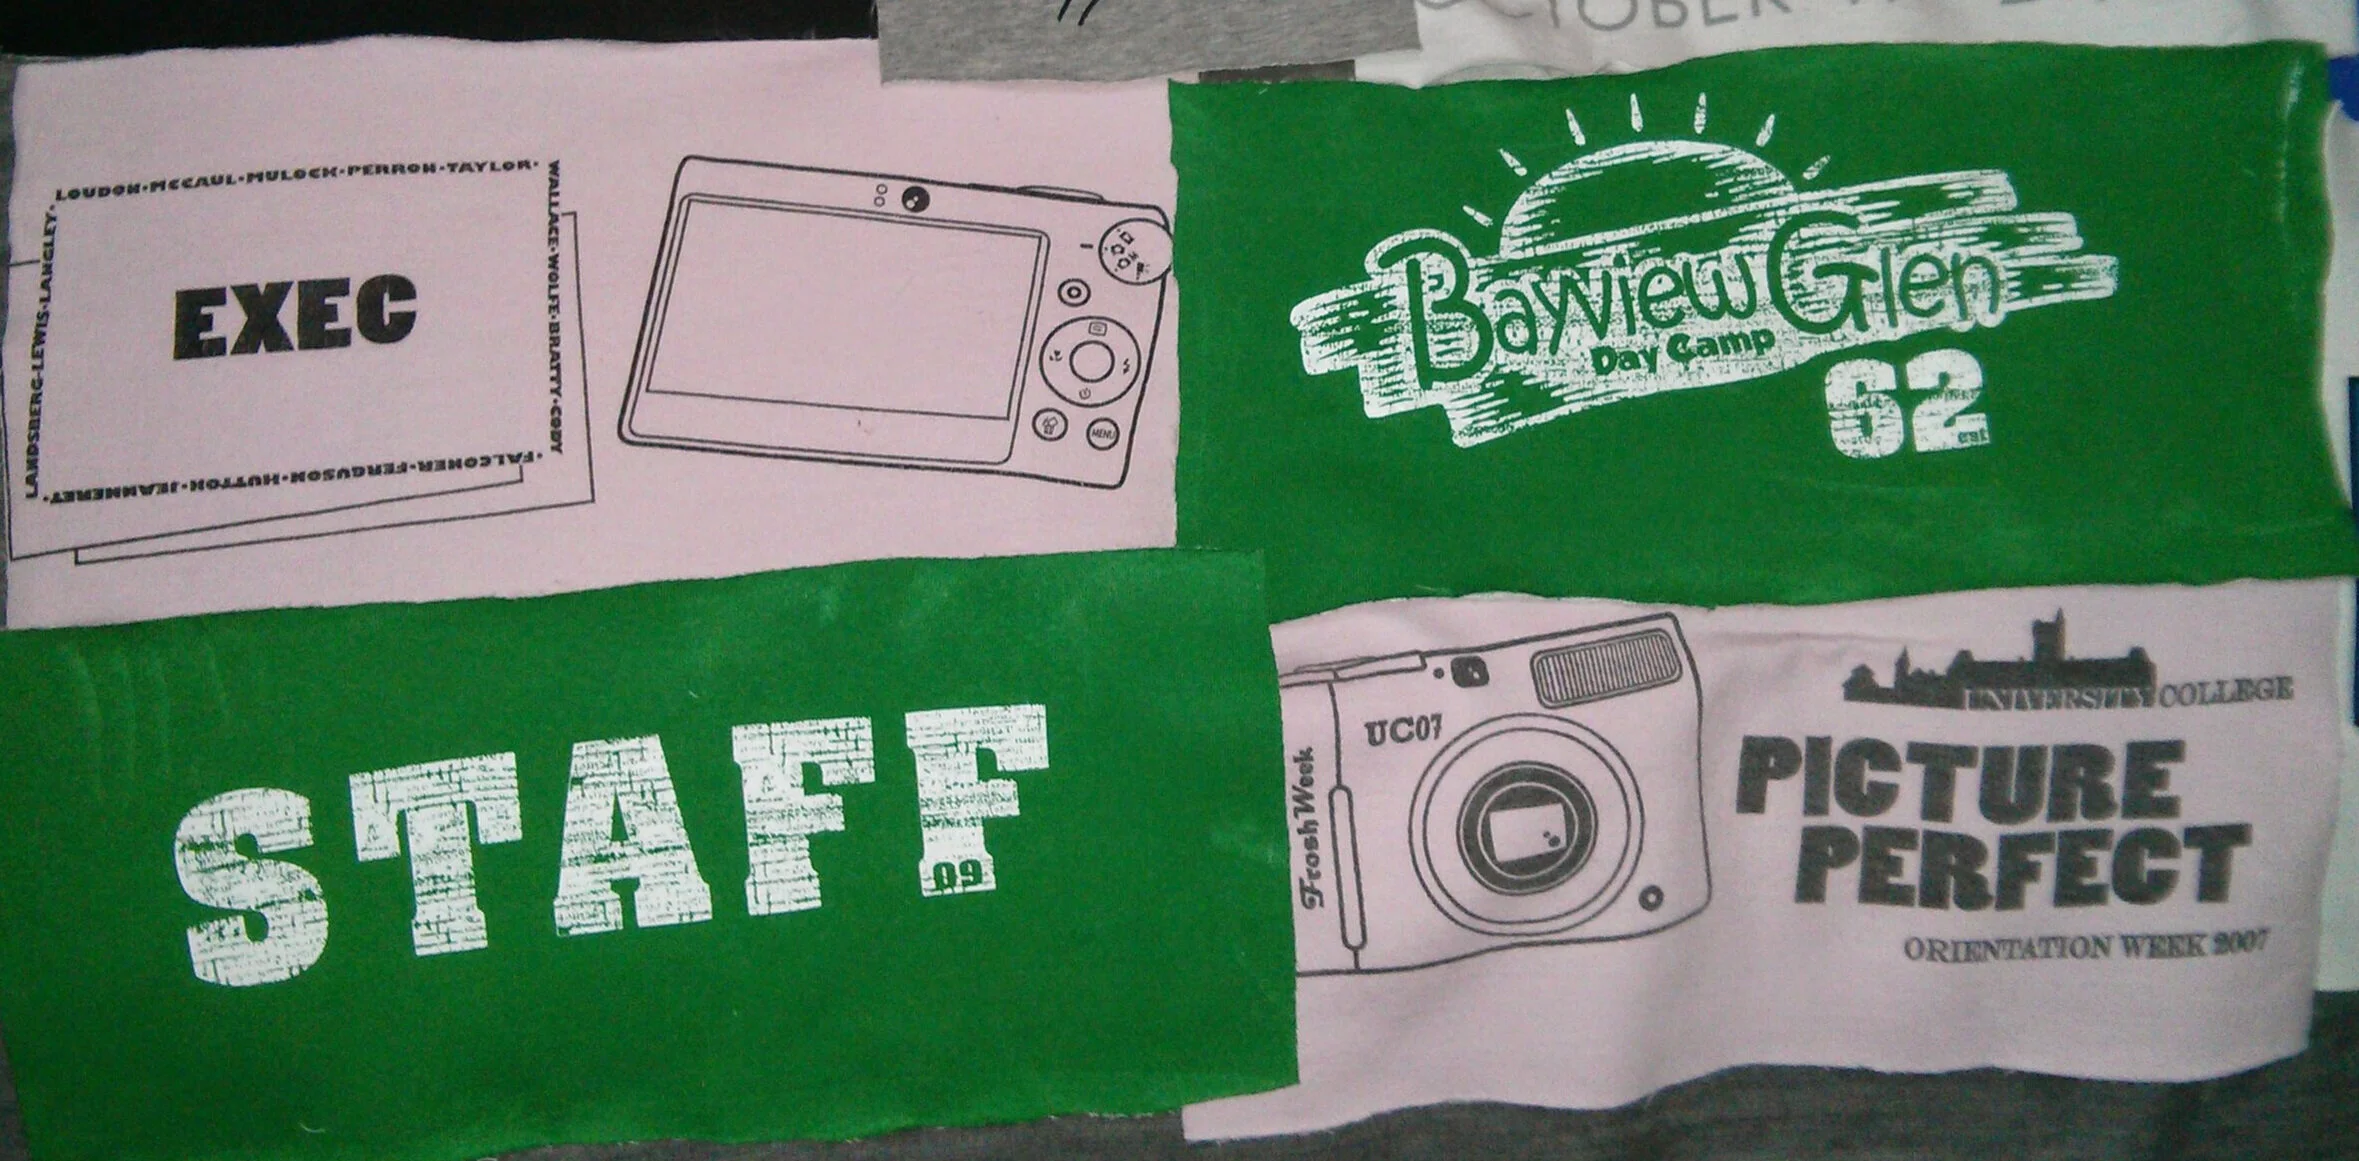
Leave extra space around your logos and graphics if possible. If you have the option to leave additional negative space around your logo, it will give you flexibility when experimenting with different layouts. Take a look at the middle photo below, I could have cut closer to the bottom of each graphic but I have learned that you may need an extra few centimeters of fabric on one square to line it up nicely with another square. The downsize of this approach is that you will end up discarding interfacing.
(click on pictures below to expand the photo and caption.)


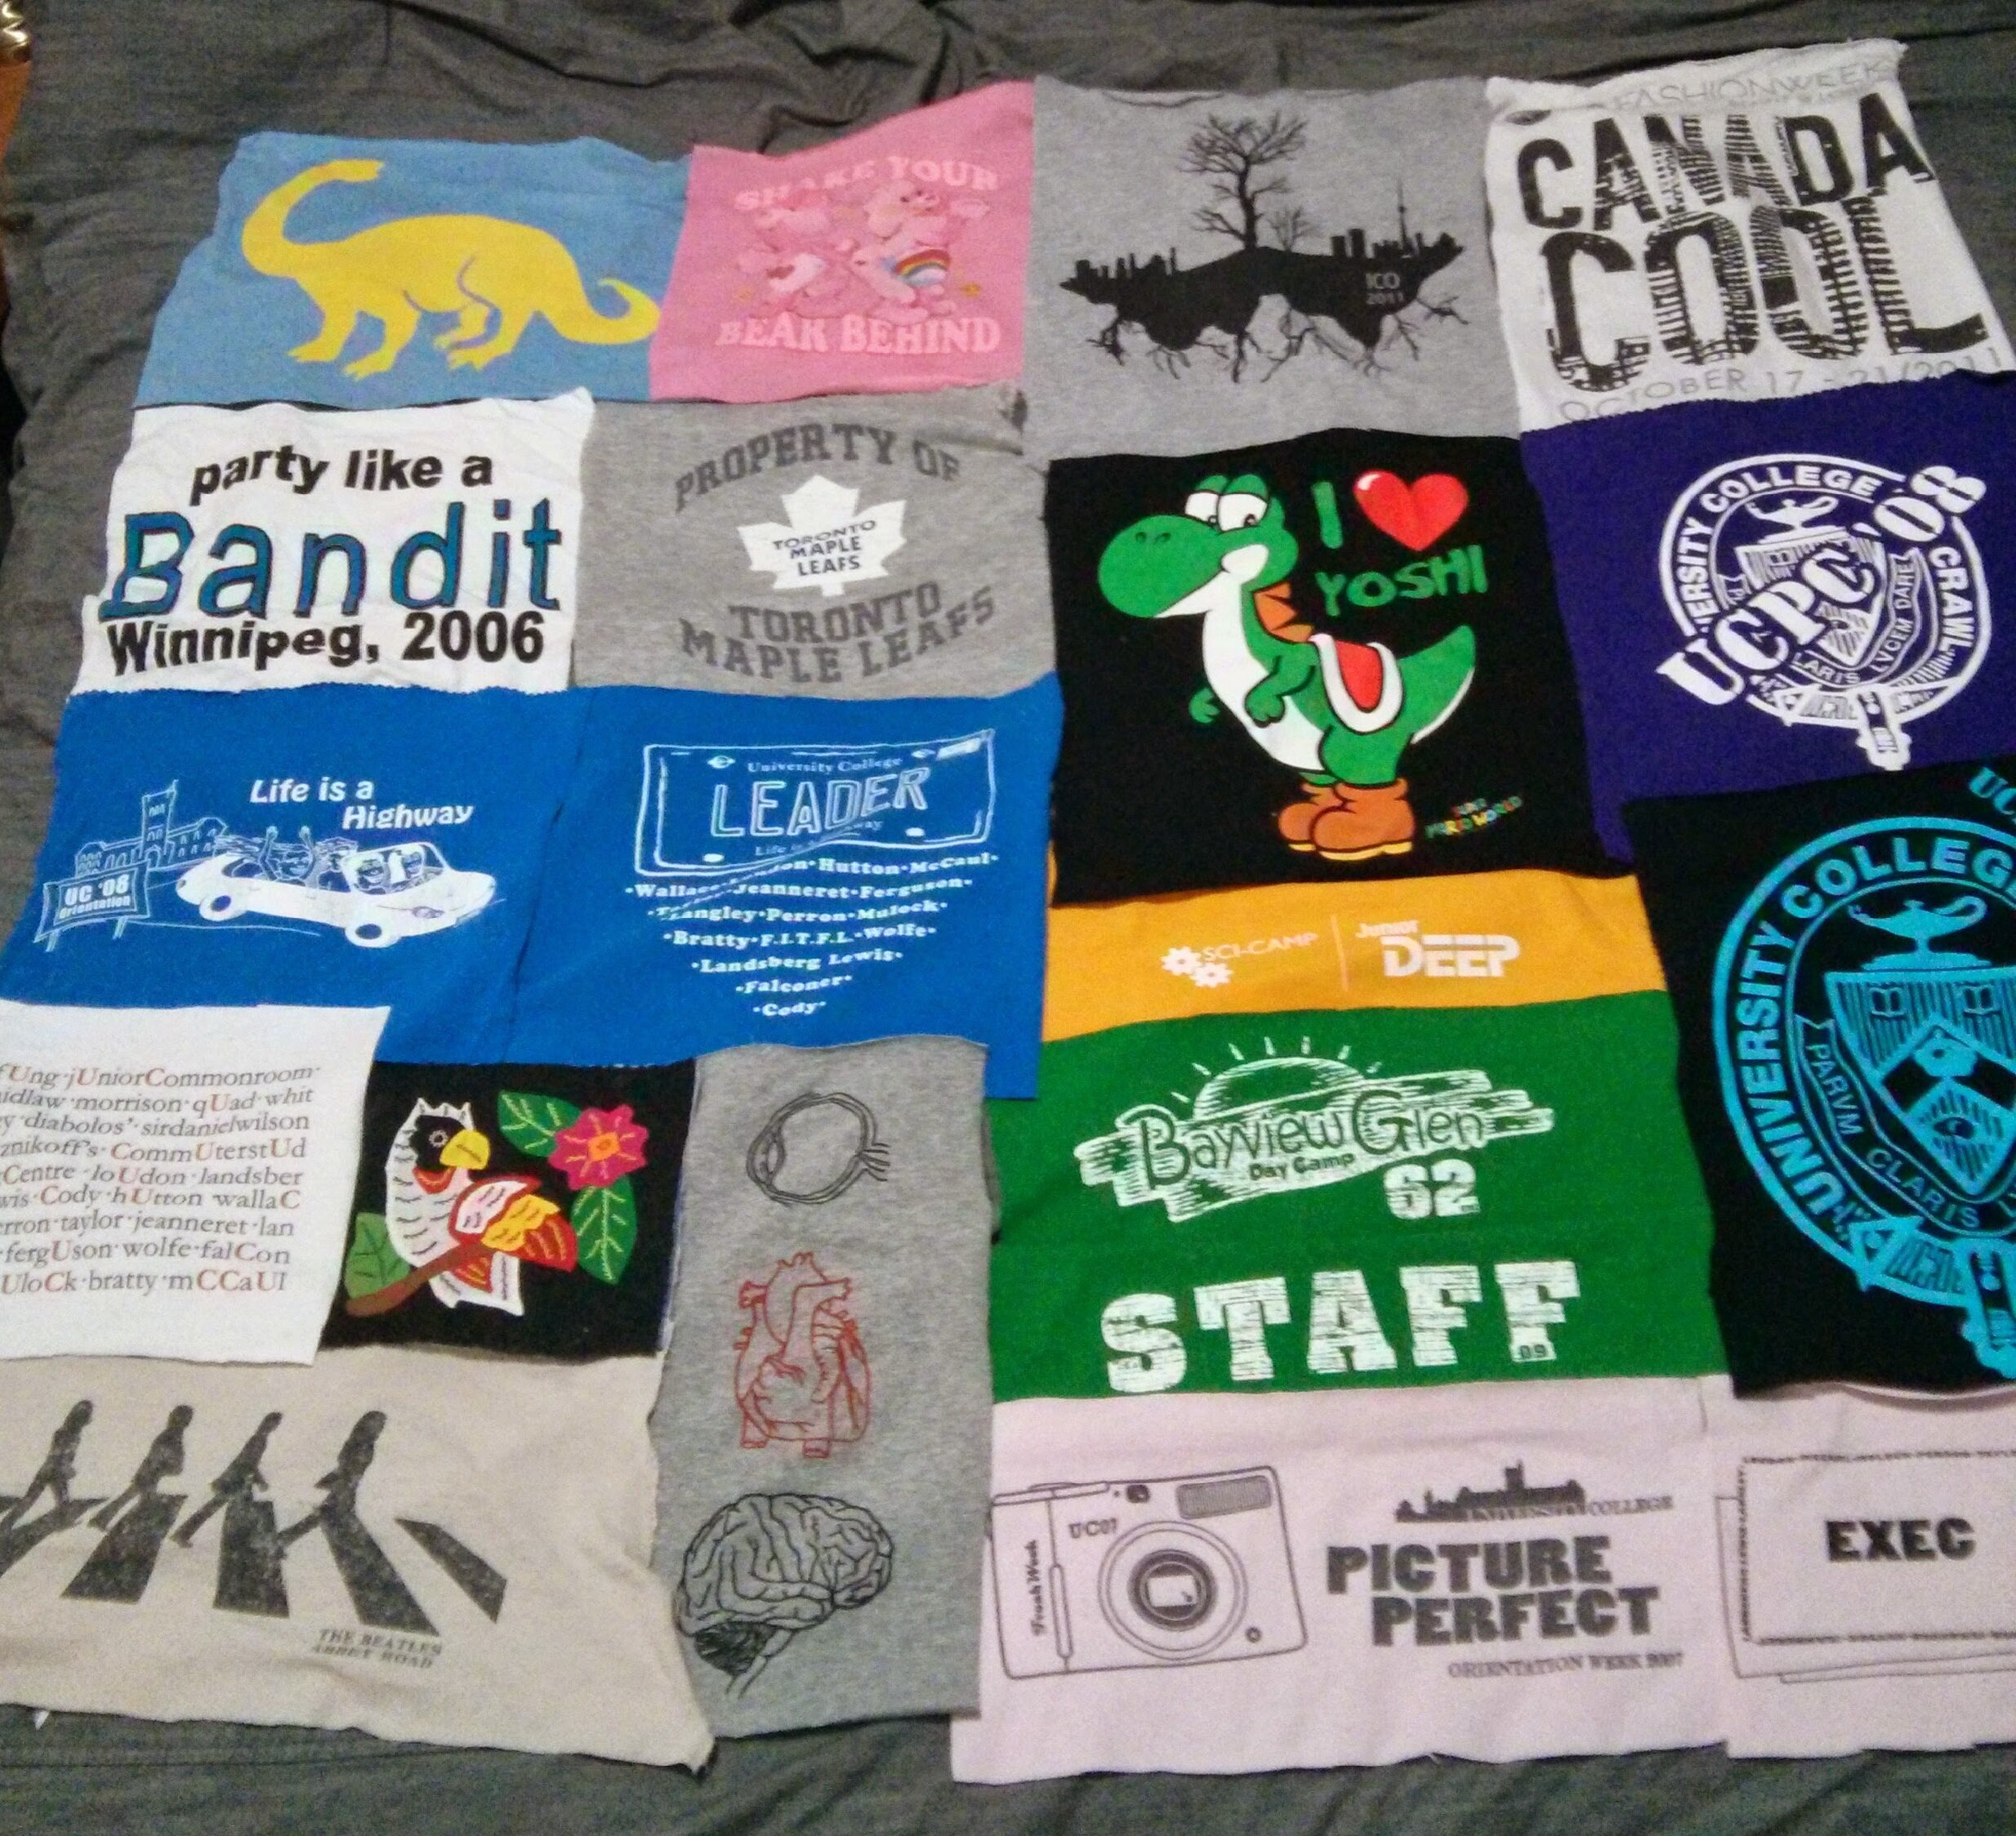
Once the t-shirt squares are washed and interfaced, it is time to start designing. This is the first chance you have to experiment with different layouts according to the colours, sizes, and themes in your quilt squares. I will be honest that this is the part of the process that I find hardest. There are so many ways to lay out a quilt and find squares that match well; I find it hard committing to one. When it comes to designing the layout, I have learned not to get preoccupied with trying to find a uniform size. This seems a bit counter intuitive because a uniform size would lead to neat rows and columns. I’ve just found that uniformity is harder to achieve in practice. If there are obvious consistencies across the height or width of several squares, size is a great way to begin designing. Otherwise, my advice is to let colour and theme guide the design.
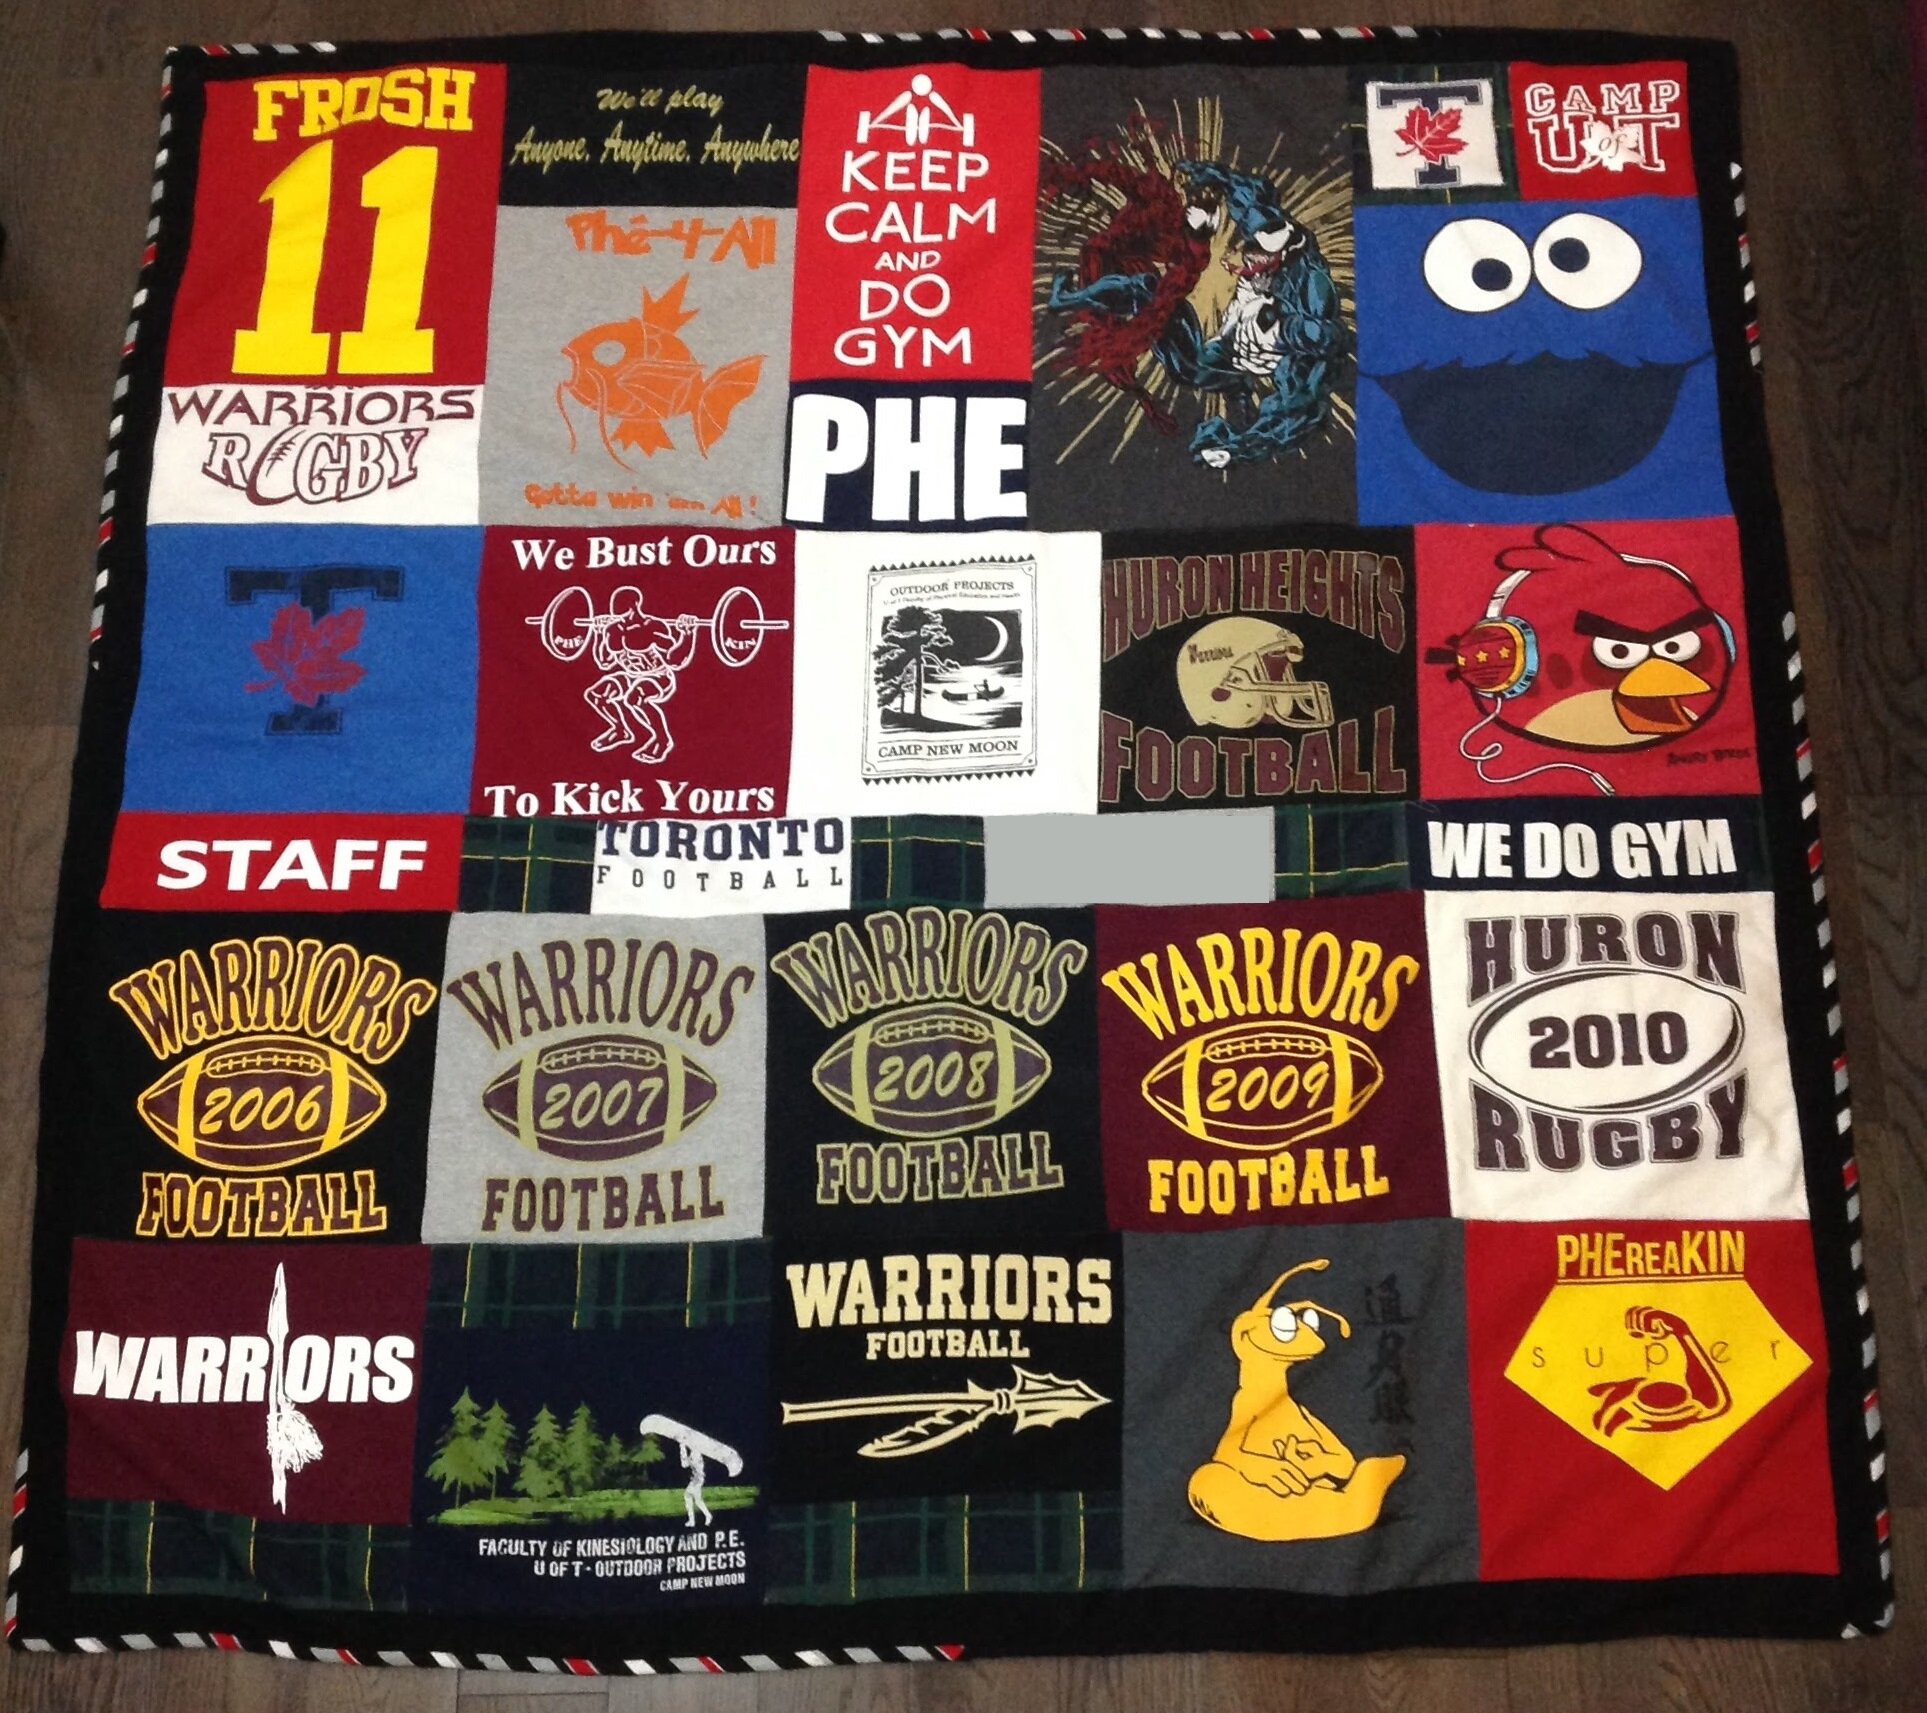
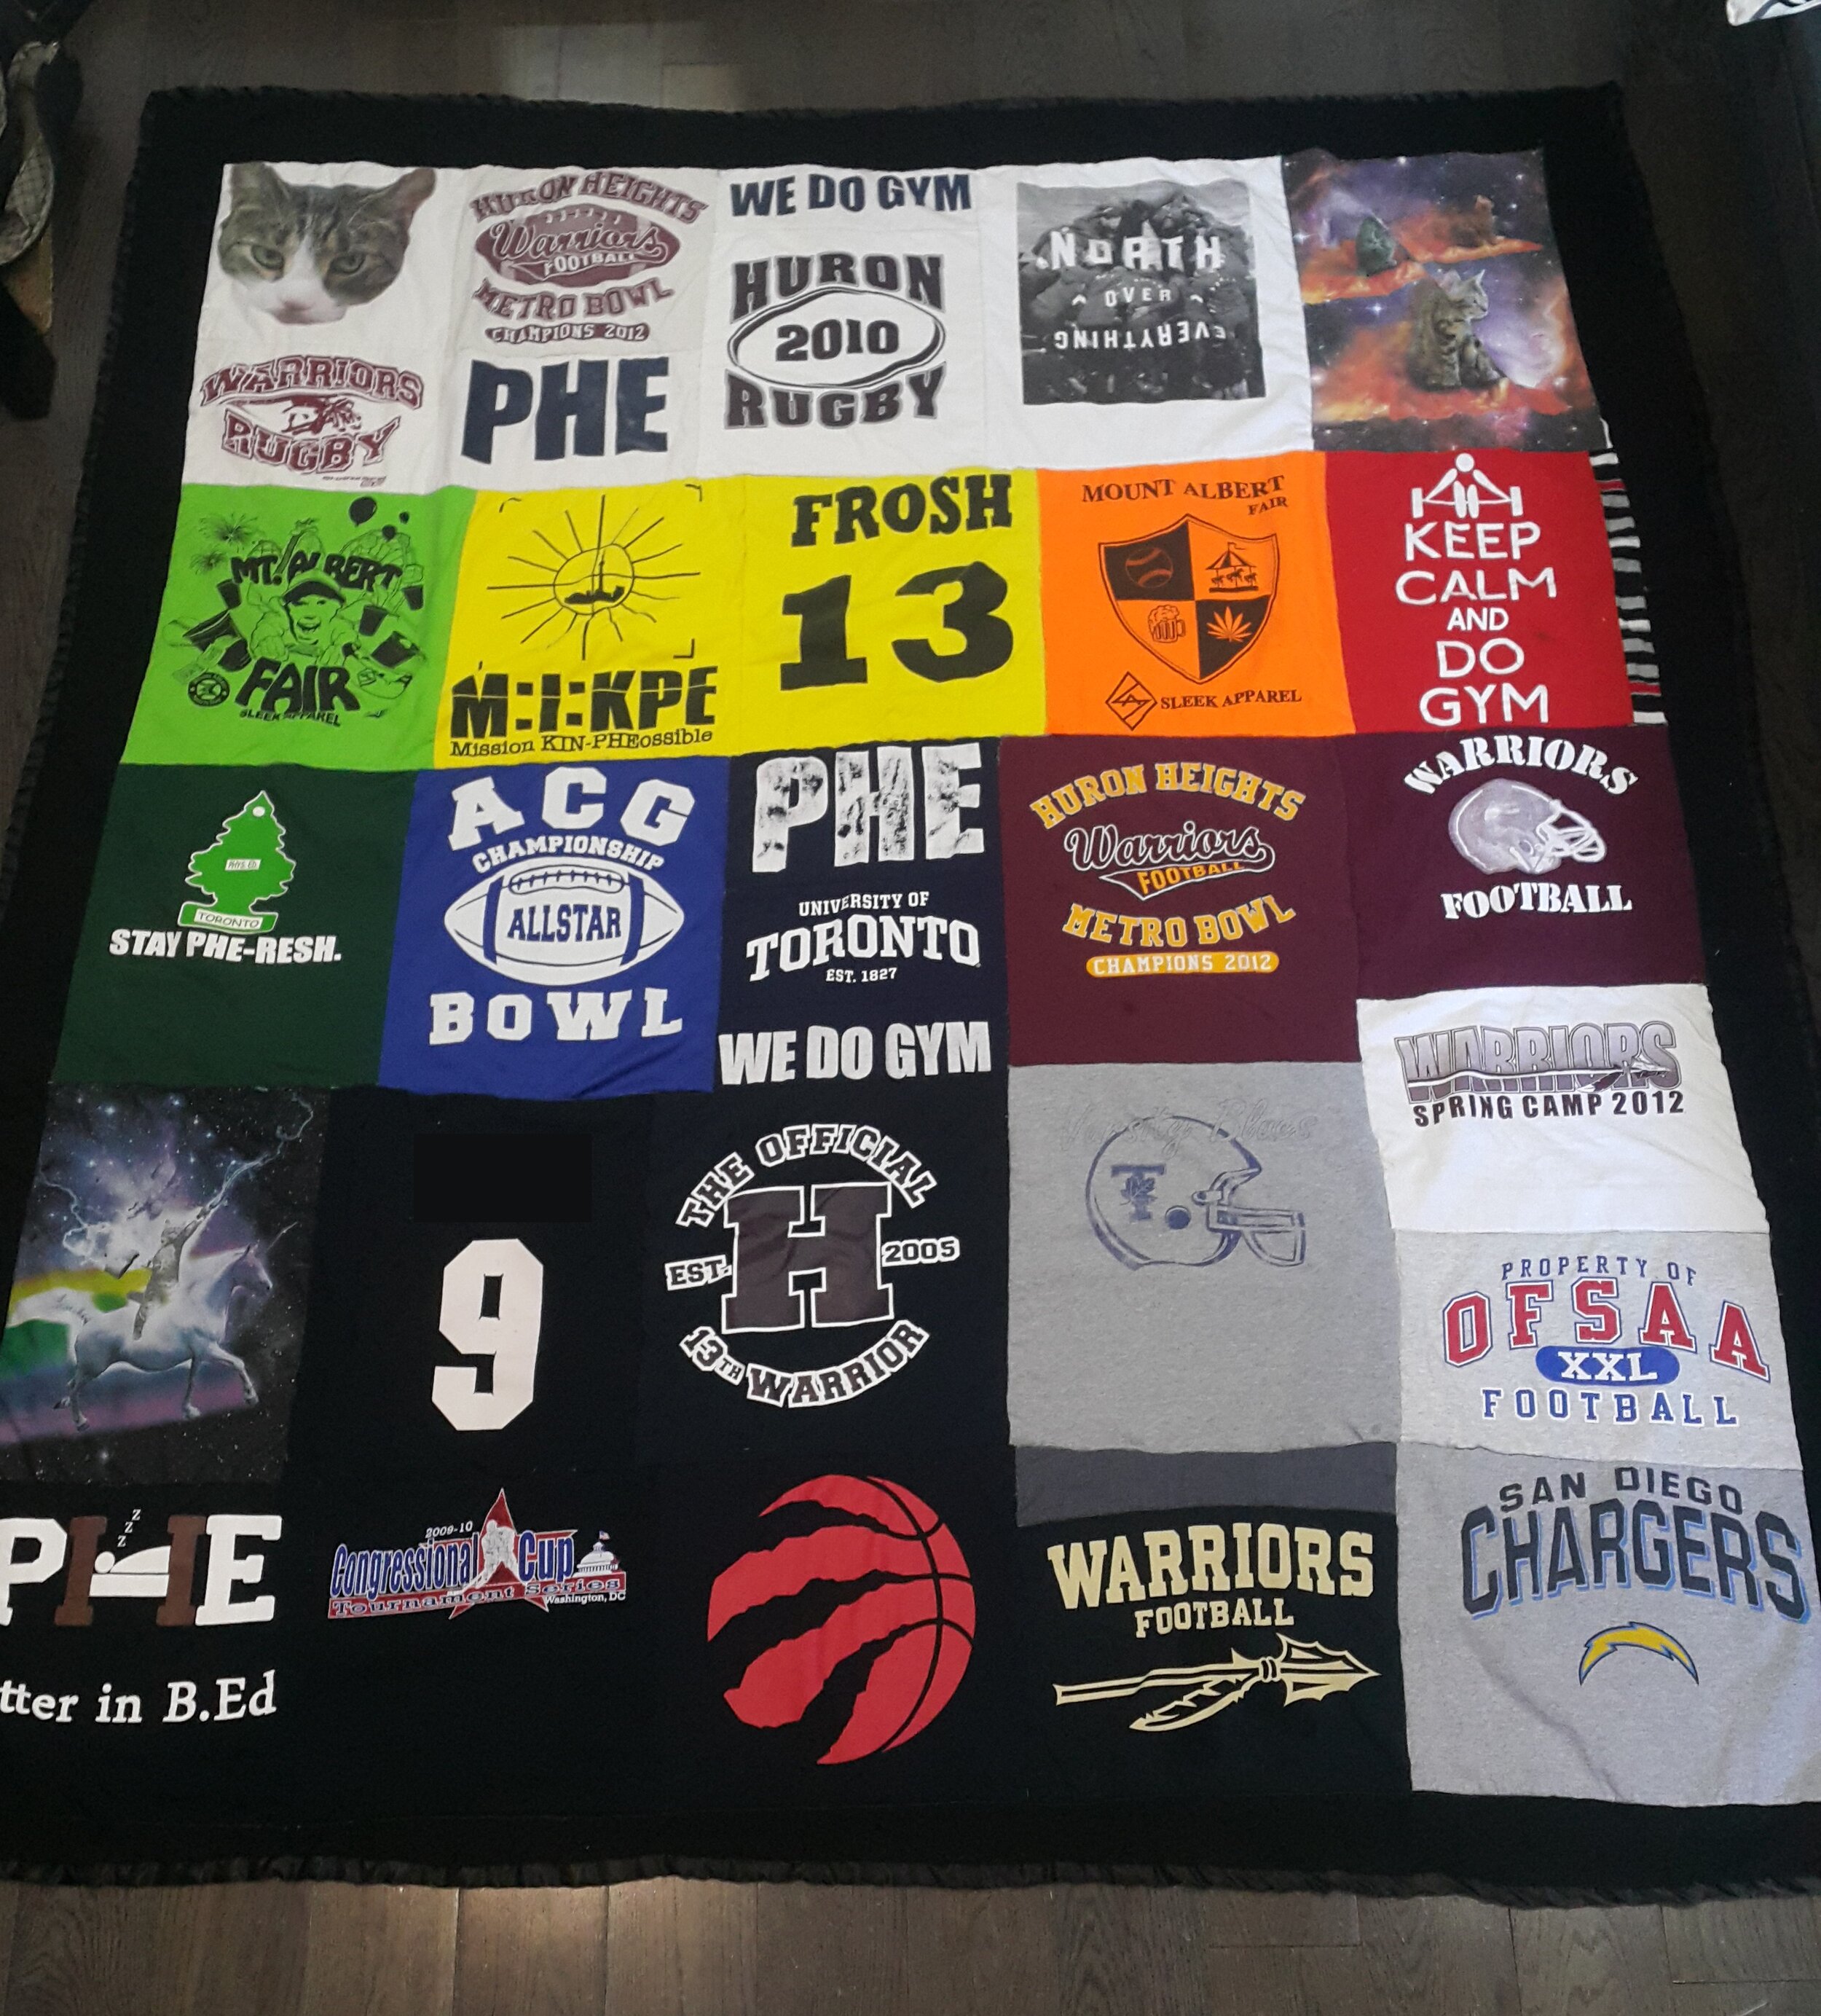
Here are a couple of additional notes about the design and layout of your quilt top. Below that are some photos of the quilts I’ve made, in the order I’ve made them, so you can see some different layouts and the ways I’ve incorporated these recommendations myself.
Play with negative space. As you continue to play with different alignments, you are ultimately aiming for a size that makes sense (is this for a bed, is it for your couch? how big does it need to be?). has square corners, and straight edges. As a result may find that extra patches are needed to fill in gaps. This is where additional space (as per my note above) can help. Alternatively, this is a great way to use scrap fabric.
A nice wide border is a great finish to a quilt top. I finished my first quilt without a border, just binding, and it looked so strange to me until I worked on my brother’s quilt, watched a video on borders and thought to myself “Ooooohhh.” I’m not sure why I only considered using t-shirts for the quilt top and not supplementing with new cotton. A bonus border tip: I recall watching a Youtube video with Jenny from Missouri Star Quilts and she said that the colour of the quilt border is typically the colour your quilt will “read” from a distance.
If your backing fabric has a pattern, purchase more yardage so you can match. I’ve now made two quilts with a patterned backing and it wasn’t until I was looking at pattern instructions for a jacket that it clicked that additional material is needed if you want to match your patterns. For the third t-shirt quilt, I had *just* enough material for the back, but unfortunately you can identify where the seam line is by looking at the pattern.
Binding can be made from a variety of fabrics. I made the binding for my quilt and my brother’s quilt out of quilting cotton and cotton fleece respectively. For my other brother’s quilt, I used a prepackaged satin binding from Fabricland. I really liked the texture the satin added to the edge of the quilt. I also liked how convenient pre-made quilt binding is. Using double-fold tape or quilt binding can save you a lot of ironing. Also, I’m not sure about you but when sewing strips of fabric together, I always mess up the bias seam and end up creating a right angle instead of one continuous length.


Hand binding your quilt may not be worth it. I acknowledge that this may be an uninformed, controversial opinion and I may need to make and use several more quilts before I can truly verify but, out of the five quilts I’ve made, I’ve bound four of them by hand. Because of a time crunch, I machine bound the fifth quilt and was pleasantly surprised at how easy and fast it was. Getting ready to bind your quilt is exciting because it means you’re almost finished. For me though, I know I look at the binding process as a bit daunting. I may try to machine bind my next quilt to see how it wears.
[01/25/2020 UPDATE: I tried machine binding the remake of my t-shirt quilt.]
What I have most enjoyed about making multiple t-shirt quilts, and sewing more generally, is the opportunity to apply the things I’ve learned to the next project. It was really satisfying to write this post because it was a chance to reflect on years of practice. The biggest thing I’ve learned about sewing and any hobby is to find the process rewarding, not just the end product. The ultimate source of motivation.