Making a Vertical Lettuce Garden out of a Wooden Pallet
There are so many reasons why I love these vertical lettuce walls. First, they are a great use of vertical space, which is a big win when you have very little growing space. One lettuce plant can offer multiple harvests and the ability to cut fresh lettuce as you need it becomes a lovely summer luxury. Finally, the lettuce garden is really pretty, especially when a few flowers or other plants are included.
As far as the construction goes, the project can come together in just a couple of hours. Because the garden is vertical, I recommend that you give the soil a few days to settle. To help with this, you can water just the soil to help remove any air pockets. If you’re eager to plant, be aware that you may have to use your fingers to push your plants back into position. It’s easy enough to do, provided they don’t sink too deeply. Eventually, as the roots establish themselves, the plant will be held into place. I wouldn’t say that the project is inexpensive, especially since it requires a lot of soil and can accommodate a good number of plants. At the same time, we’ve grown lettuce out of the same pallet for years, so depending on how long you plan to be in your current space, this could be a worthwhile project.
Getting Started: Materials + Time Investment
You can find a full description of the materials and all the steps involved, but here’s a quick summary of what’s required for this project:
Materials: pallet, landscaping fabric, soil, plants, access to a water source
Tools: scissors, utility knife, staple gun, staples
Time commitment: one afternoon to construct the pallet, 48 hours to let the soil settle (optional), one hour to fill the pallet with plants
Nice to have: broom for sweeping soil, trowel for scooping soil
What you’ll need to maintain it
Once it’s set-up, the vertical garden will require daily watering, especially in the hotter weather. Even though the pallet is full with tons of soil, it’s quite exposed so there’s lots of evaporation happening through the fabric. When the temperatures are cooler, like in the spring or fall, or if it’s rained a lot, you can skip watering days. For the first few days after you’ve planted, you may have to top up the pallet with soil as things will still shift around a bit until the root ball is established and can hold the plan in place.
What to grow in a vertical lettuce garden
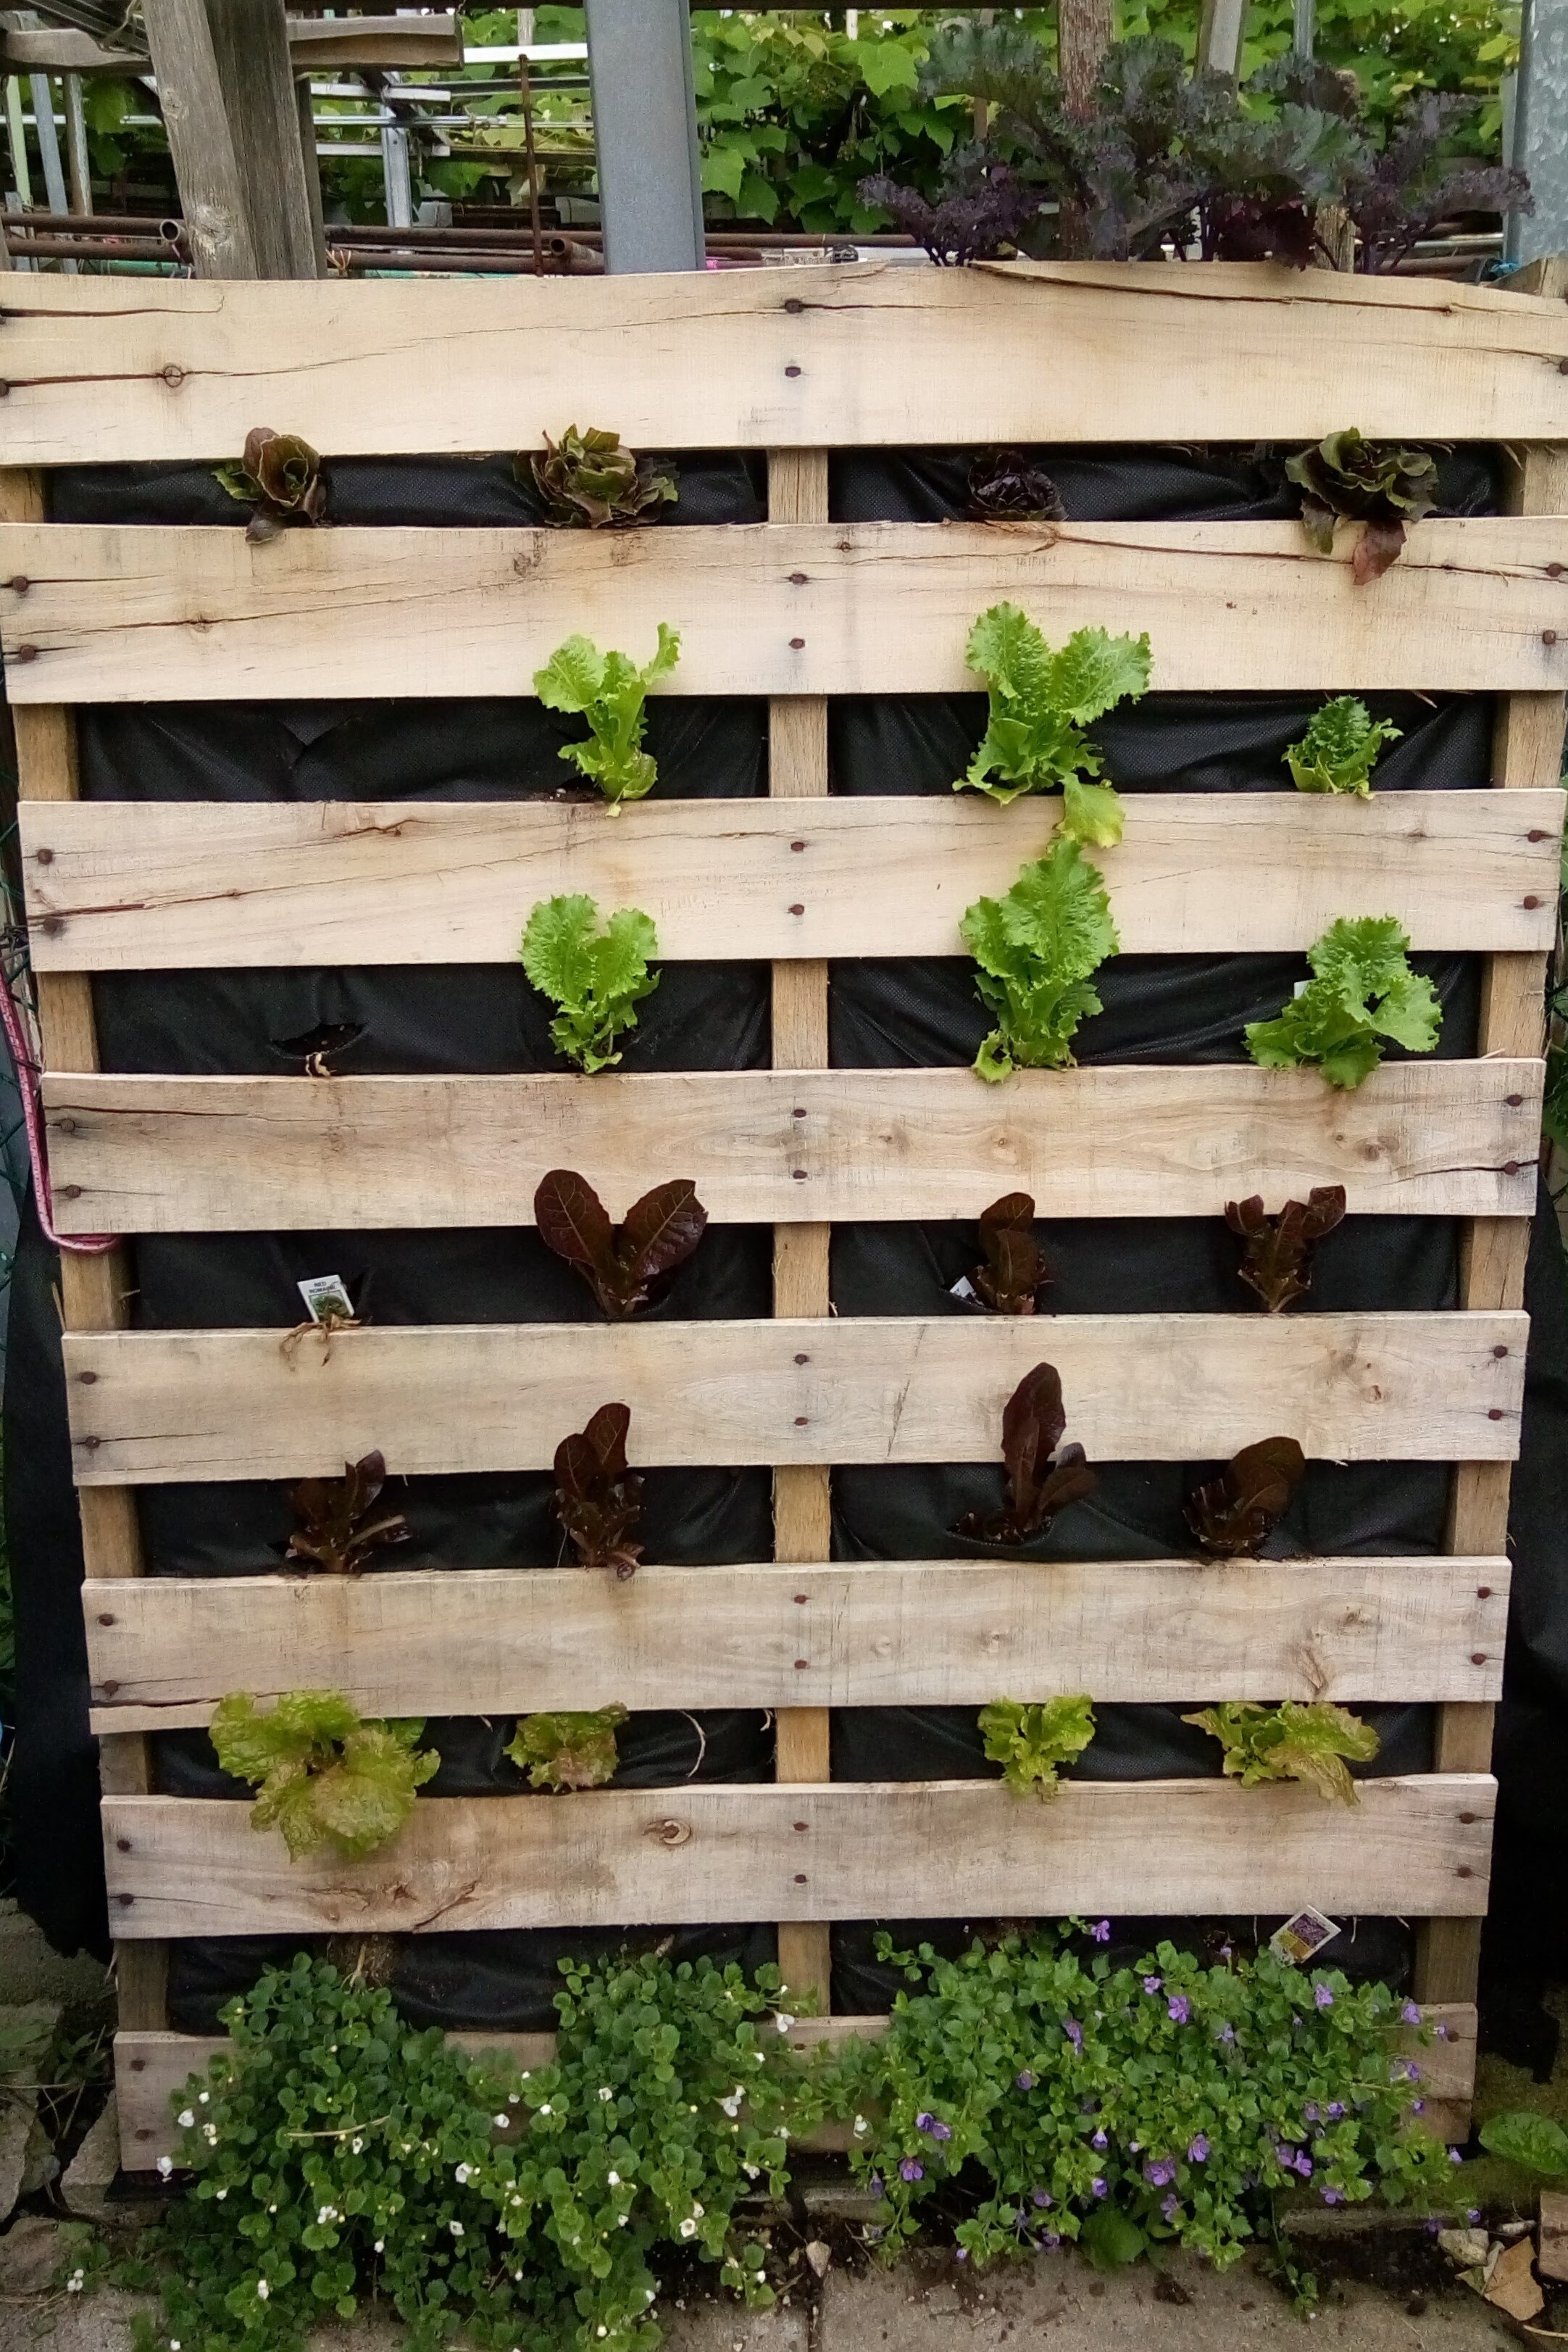
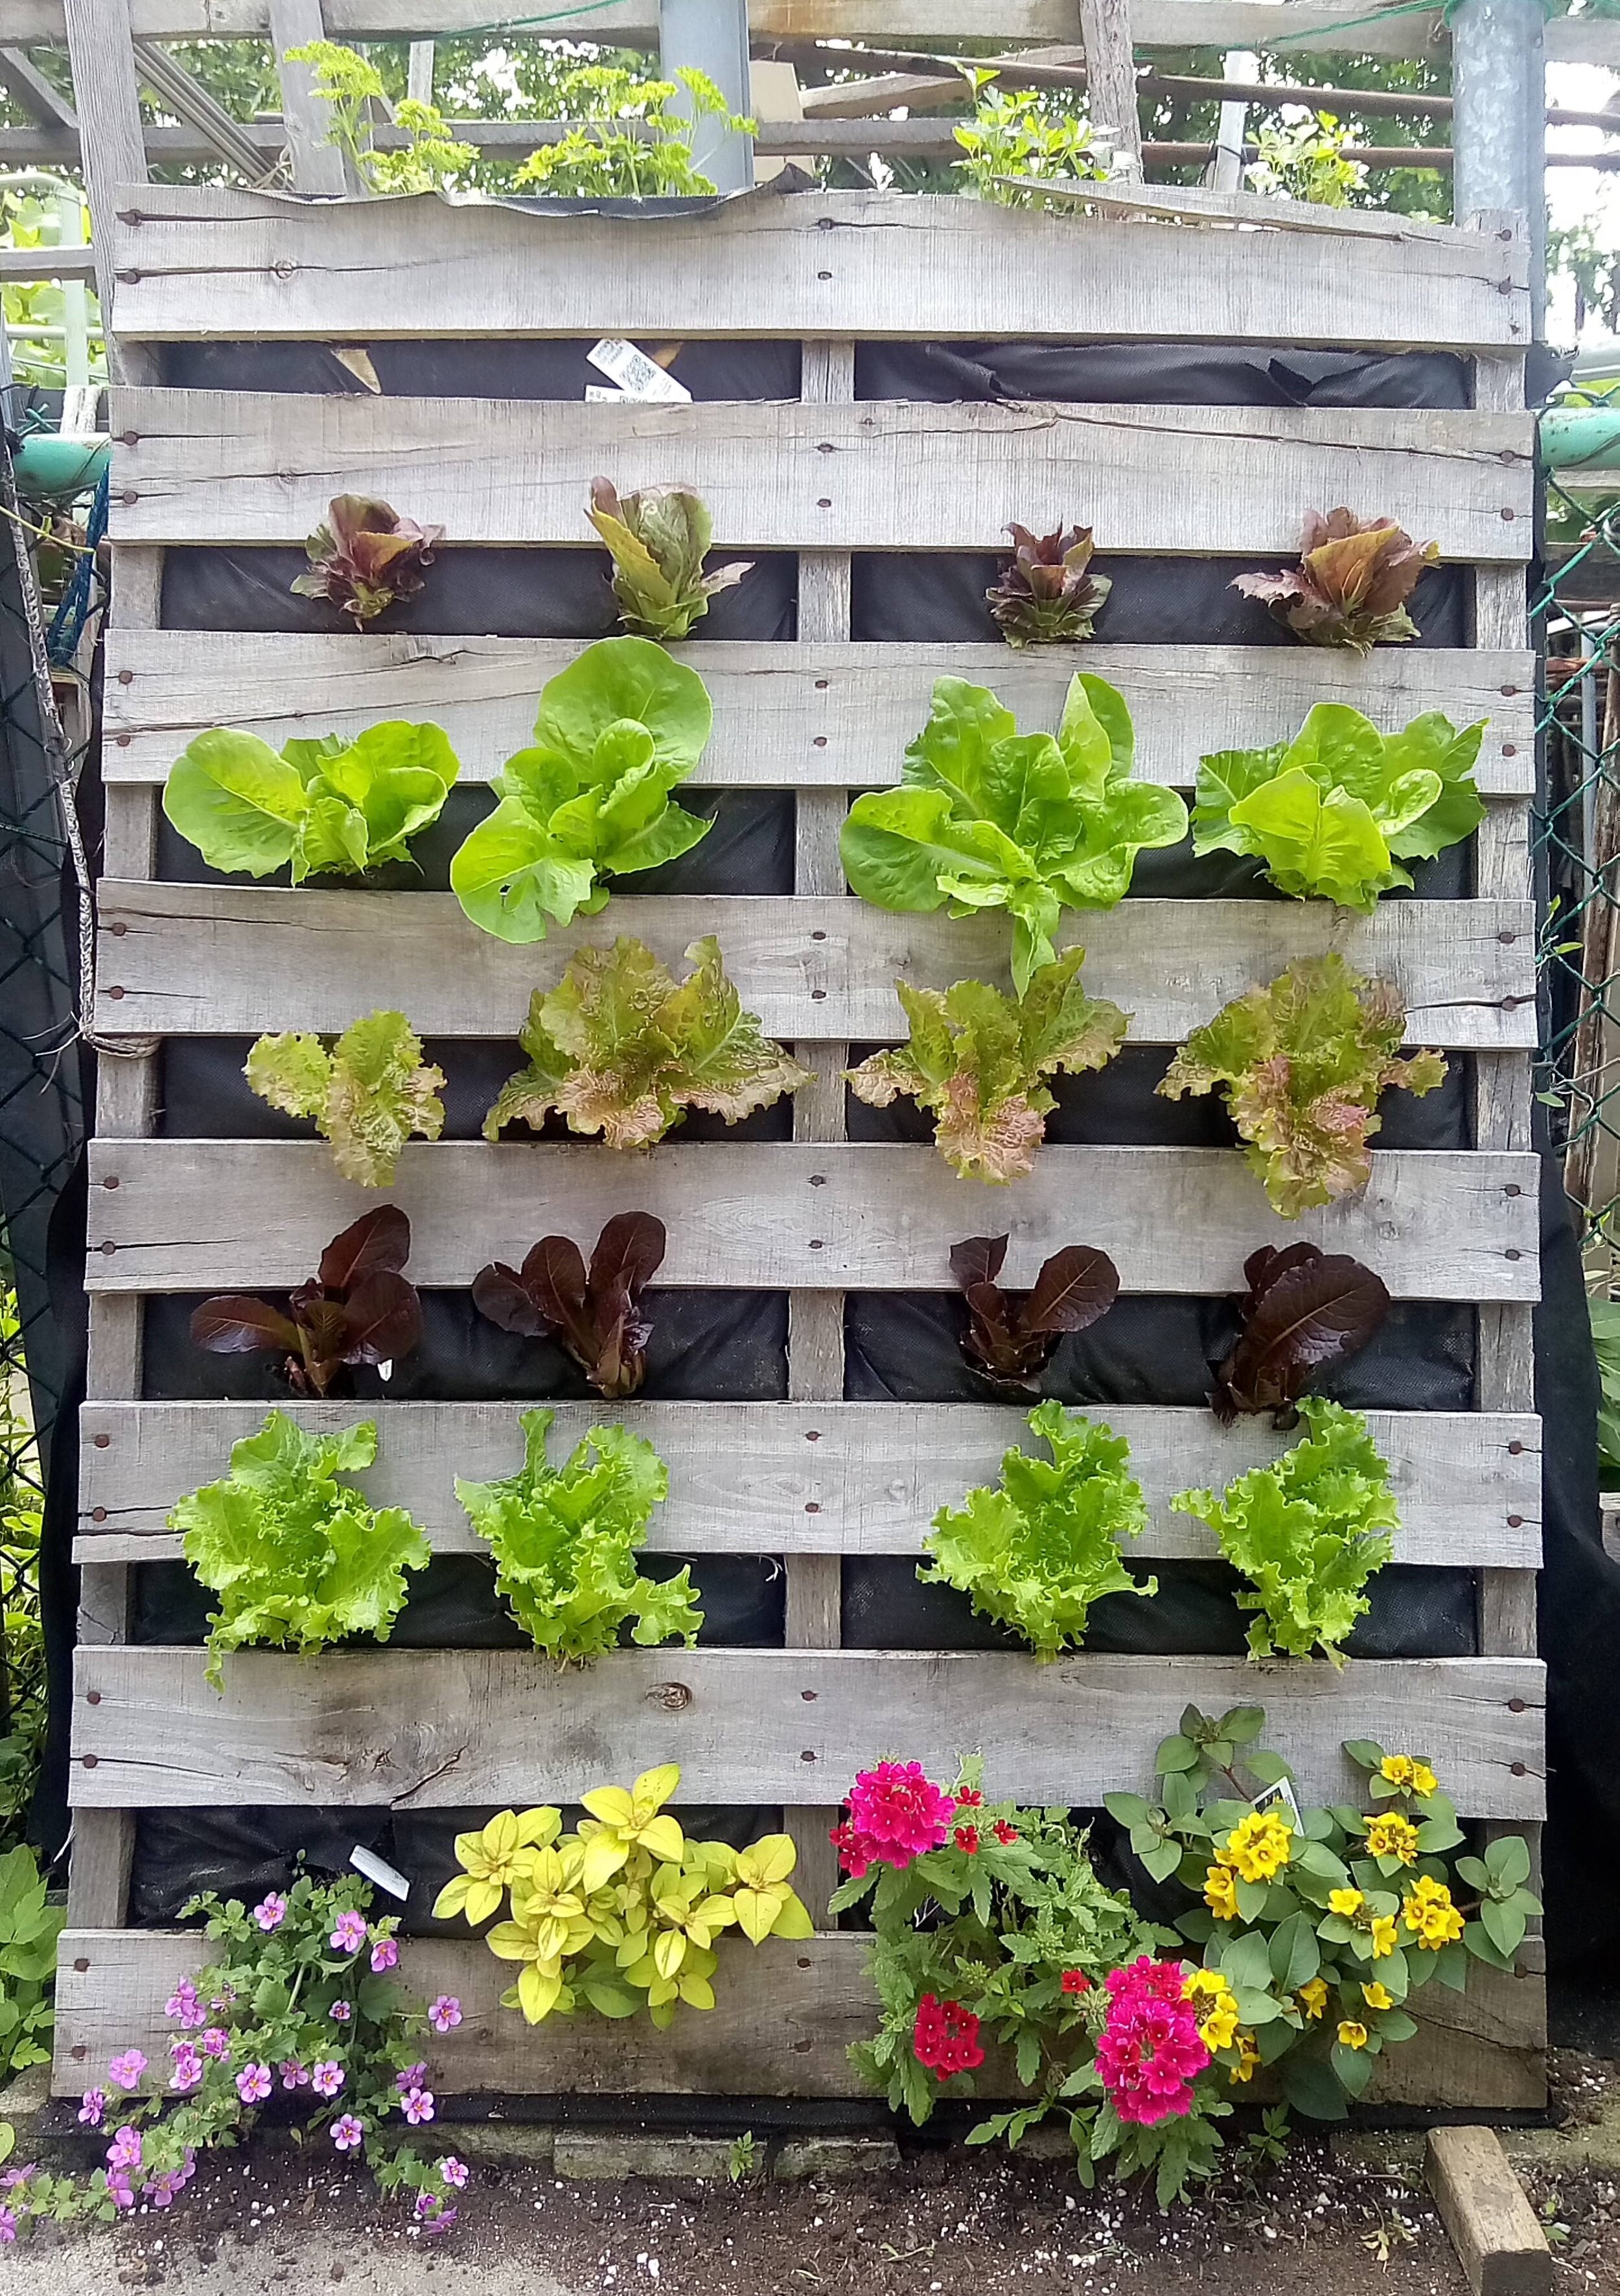
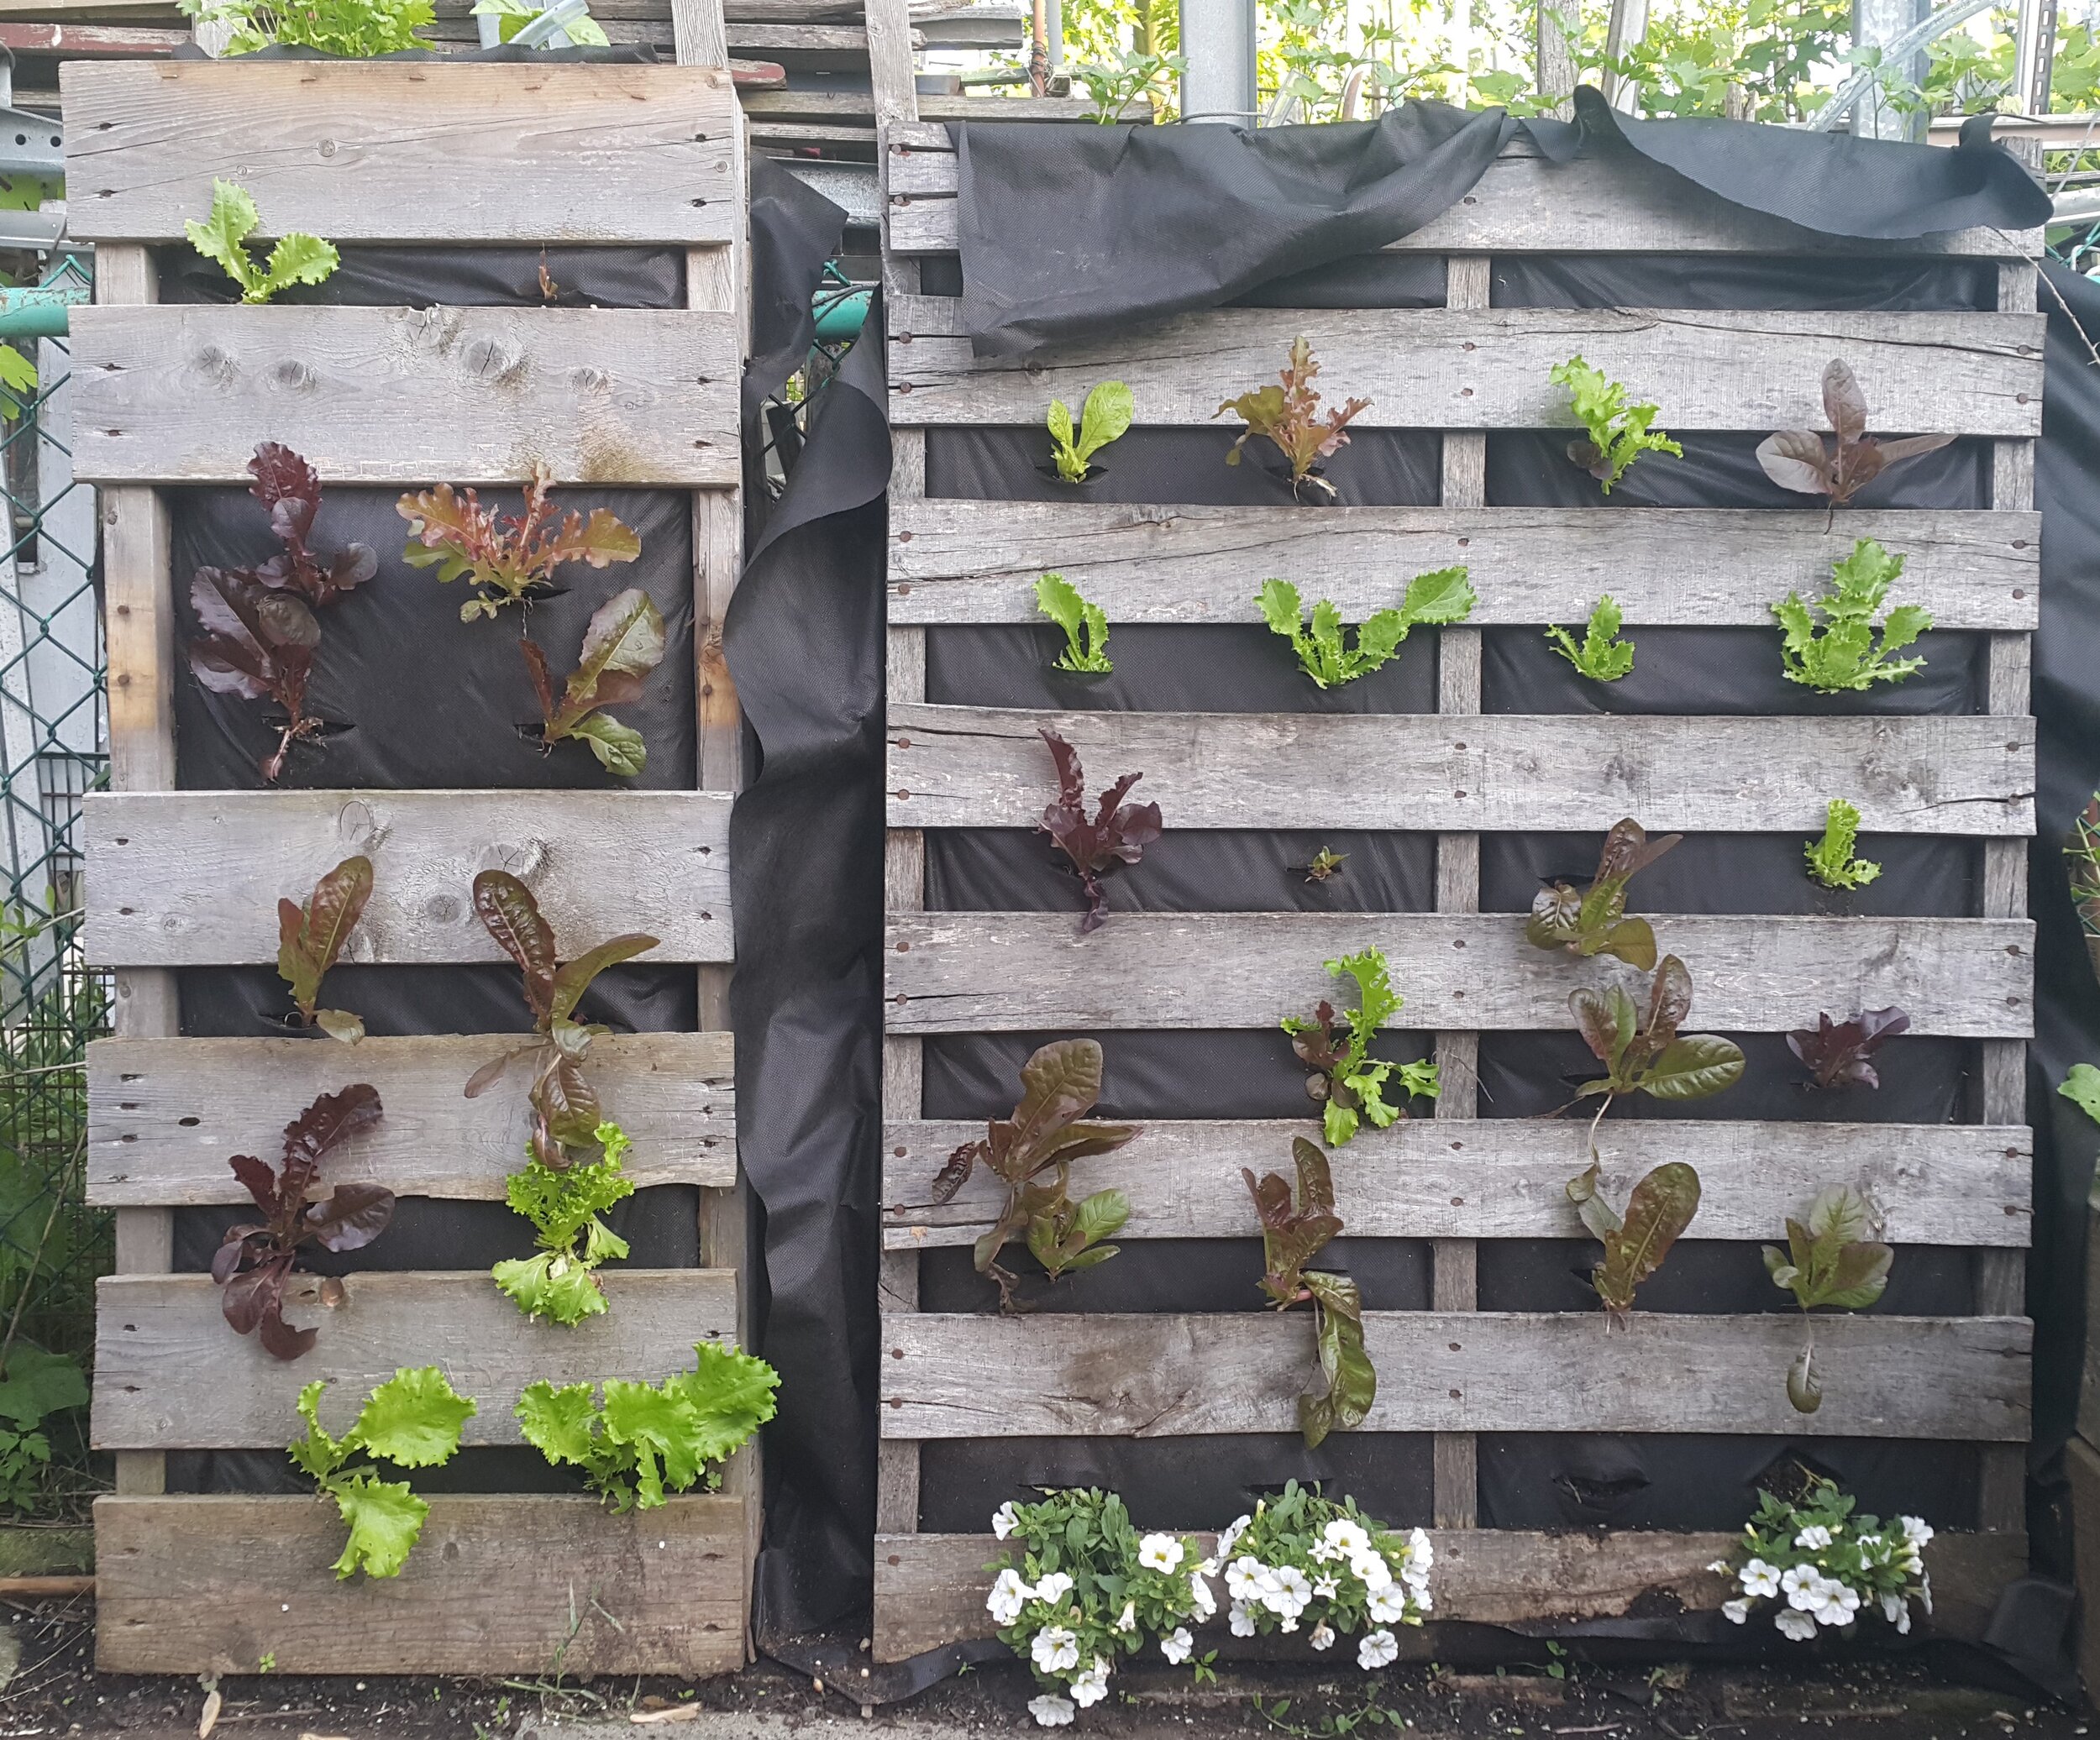
(Click to enlarge the photos above). Lettuce, regardless of the variety, is a cool weather crop. I live in zone 5 and can grow lettuce, without any protection or cover, beginning in mid-May. It tends to bolt (go to seed) by mid-July at the height of the summer heat. We’ve grown many varieties of lettuce over the years, including Nevada lettuce, Boston, Oak leaf, and red leaf. The varieties to look to for are leafy lettuces, which are also sometimes sold as “cut and come again lettuce” or “mesclun greens”. Last year we tried romaine, which is a head lettuce, and we had success removing a few leaves at a time. The top of the pallet remains open open and exposed to, we’ve added herbs that thrive in more sun -- including basil, parsley, and cilantro. I tend to keep the bottom row open for flowers, because this row tends to get splashed with dirt over time. One year, I included trailing flowers in the top which was a nice way to incorporate colour in the garden at eye level.
We started with one pallet and turned into a vertical garden that held: 4 herb or flower plants along the top, another 4 flower plants in the bottom row, and 20 lettuce plants across the front. A couple of years later, we added half a pallet, which allowed us to grow 8 additional lettuce plants and 2 more herbs.
Materials List
You will be able to find most of the materials at a hardware store or garden centre but you may have to search around for a pallet. Check with places that receive a lot of deliveries - you can check with your grocery stores, garden centres, or hardware stores.
Wooden Pallet: To make a pallet garden. First, you will need to source a pallet. There are a few different pallet types and shapes of pallets which you can read about here. To grow food, we are using pallets that are heat treated, rather than chemically treated. We found our pallet outside of a restaurant but you could also try grocery stores and garden centres; any store really that receives large shipments of materials (please ask before you take anything!) In our experience, people are fine to let them go for free. Once you find a pallet, you’ll want to look for a stamp that indicates it is heat treated. To read more about pallets and their safety, I used this website: https://www.canadianpallets.com/en/about-pallets.aspx.
Soil and Plants: A full sized pallet will require about 160 litres of soil, which is quite a bit but after this initial investment you can use the majority of the soil again. Every tear we top up the soil and fertilize to replenish the nutrients. I think it’s a good idea to replace the landscaping fabric and mix the oil soil with fresh manure every year or two years. Small seedlings are a couple of dollars each and I buy these from the garden centre. Last year in preparation for the fall, I tried to start lettuce by seed for and it was a moderate success.
Bungee cords or ties to secure the pallet once it’s standing: Once full, the pallet is really heavy. Heavy enough that it might be sufficient enough just to lean it into place. As a worst-case-scenario, glass-half-empty kind of thinker, I decided to secure the pallet to the fence with bungee cords.
Landscaping fabric to hold the soil in place: Landscaping fabric is a thin, synthetic material. It’s porous, which means water and air can run through it, but it’s also quite durable. The landscaping fabric will be used to line the inside of the pallet, creating a pocket of sorts to hold the soil.
A few tools: To secure the fabric to the inside of the pallet, I used a staple gun and lots of staples. It’s important to keep the fabric as tight as possible and to minimize gaps, all of which helps to keep the soil secure and the pallet full. To cut the landscaping fabric from the role, I used regular scissors. In order to add plants to the front of the pallet, I used a utility knife to make a small slash.
A plan for irrigation: I got into a few irrigation options further in this post, but considering how you will water your vertical garden is important to help you determine what materials you need. It could be as low tech as a large watering can or as hands-off as an automated drip system. For years, I opted to drag my garden hose to the pallet and water it from all sides.
Step-by-Step Construction
Here’s a video on how to make a vertical lettuce garden out of a wooden pallet. Below this video are the written steps with a bit more detail as well as information on how to harvest lettuce, irrigation options, and some of my favourite vegetable growing resources.
Measure and cut landscaping fabric
Once you have all of your materials gathered, you want to lay your pallet down on the ground, front side down. Position the pallet where you will eventually want it to stand. Once it is full of soil it will be heavy and difficult to move. The landscape fabric will be used to line the pallet, essentially creating a pocket for the soil. You will need to cut fabric that (1) fits the width of your pallet (plus 4” of overhang for wrapping around and stapling to the sides) and (2) is at least two times the length of the pallet. The fabric will line the front and back of the pallet. A whole piece of fabric is ideal so that there’s no risk of seams ripping and soil leaking out.
2. Line the front of the pallet with fabric
Once your fabric is cut to size, you will need to staple the fabric to the front of the pallet with your staple gun. Staple the fabric to the front side of the pallet first. You want your fabric to be as taut as possible. The soil will fall into any slack left in the fabric once you stand it up.
3. Fill pallet with soil (and, optional step, add irrigation)
Once the fabric is stapled to the front of the pallet and while it is still face down, add your soil. If you are using some sort of irrigation method, string this through too.
4. Close the back of the pallet
Once your soil is in, it's time to use the excess fabric and seal up the back of the pallet, essentially creating a little pocket to hold the soil. Make sure to staple the fabric to the wooden slats that run across the width of the pallet (both top and bottom) as well as along the sides of your pallet (following the shape of the pallet). Again, the goal is to remove as much slack as possible, so you will likely use a lot of staples. When you stand your pallet up, the soil is going to fall a bit so we want to give it as little room to move as possible. The soil will also fall out of any gaps, so make sure it’s sealed well.
5. Stand-up and secure your pallet
Once the landscaping fabric is stapled and the soil is wrapped as securely as possible, it's time to stand the pallet up. We lean ours on a bit of an angle against our fence. Because the pallet is really heavy, we secure it with bungee cords
6. Planting up the pallet
It is best to leave the pallet upright for a couple of days so that the soil settles. If you plant right away, it's likely that your plants will sink into the planter and you'll have to fetch them. To encourage your soil to sink, you can water it from the top. Before you begin planting, fill the pallet with soil from the top. Once it’s full you’re ready to add plants. To make room for the plants, use a utility knife and cut small 2”-3” slits in the fabric, just big enough for the root ball. Until the roots take hold, it’s inevitable that soil will spill out the front as you are watering, so try to keep the holes as small as possible. If you have trouble adding the plants in, you can always make the holes larger if necessary. Whether you’re adding flowers or herbs to the top, you can plant these up as you would a regular pot or raised bed
Once your holes are cut it's time to add your lettuce. Remove the plants from their container and remove any excess soil, being gentle with the roots. Use your fingers to create space in the soil and insert the roots, using two fingers on either side of the root ball to push it in.Once the root ball is in, I use two fingers around the base of the plant to push the plant inside more firmly. The lettuce tends to look a bit sad at first, but they’ll perk up after a few days. You may have to replace a couple here and there because that happens sometimes and it’s totally fine.
Harvesting
Once you see a good amount of leaves coming from your plant, you can harvest them by cutting them with a sharp knife or scissors at the base of the plant. Be sure to leave a few leaves so that the lettuce can still capture sunlight and continue to grow new leaves. The general rule of thumb is to never harvest more than one third of the plant’s total size at a time.
Pallet Maintenance
As has been mentioned throughout this post, once it’s set-up the pallet doesn’t need much maintenance. We’ve used the same wooden pallet for four seasons. You can definitely tell that the wood is wearing and has even broken off in some places, but they are still structurally sound. I have replaced the landscaping fabric twice over this time. At the end of the season, I don’t do anything. If I have any herbs remaining, I’ll prune them up and dry them. Otherwise, I let all of the plants die and dry out. At the beginning of each season, I’ll remove any old plants and refill the pallet with soil from the top.
Options for Irrigation
The first two years that we planted lettuce, we didn't have any irrigation in place. We simply used our garden hose to water from the top and through the front of the landscaping fabric and relied on gravity to help distribute. The drawback with this is that is time consuming since you’re bringing the hose head to each individual plant and hop
In order to make water more efficient, you can set-up an irrigation system. There are hoses and irrigation kits available for purchase that make water easier and even automatic, but requires a connection to a water source. One year, I tried to wind a drip hose through the pallet but there wasn’t enough water pressure to force water the entire length. There are other kits that use solid plastic tubes to carry water, which is then distributed directly to a plant’s root ball through an emitter. I’ve never used one of these personally, though I dream of having a nicely laid out, automated irrigation system.
The current irrigation system is a do-it-yourself compromise between the two options. I still drag my handheld house up to the pallet, but to help distribute the water, I direct the water into a plastic hose with holes drilled into it. The hose helps distribute the water throughout the length of the pallet without having to direct water through the front of the pallet. At the same time, it’s less set-up and expensive than a store bought kit.
A couple of plastic hose irrigation tips:
To stop the water from running through the bottom end of the plastic tubing, I sealed it up with hot glue. Alternatively, you could bend the hose and secure it with a binder clip (an underrated multi-functional household item, in my opinion).
To insert the hose into the pallet, you can lay it in while you’re assembling the pallet, before you staple up the fabric to the back in order to secure it. Alternatively, it’s possible to add the hose when the pallet is already vertical and filled. To do this, you will need a wooden dowel that is smaller in diameter than the hose. First, insert the dowel into the hose and holding onto both, push the dowel and hose down into the soil being careful not to puncture a whole through the back of the landscaping fabric. This would create a very inconvenient leak.
My Favourite Veggie Growing Resources
The internet is your best friend when figuring out what types of vegetables to plant in your space, how to prune and maintain your veggie plants, as well troubleshooting any issues. For information and inspiration about growing vegetables, I go to:
Cheyenne runs Sundance Harvest (and offers workshops) and is full of knowledge and tips for growing, fertilizing, and pruning vegetables. Because Cheyenne is operating a farm, it’s a bit of a different perspective.
Kevin at Epic Gardening’s Youtube channel who has lots of container garden and raised bed tips.
Laura at Garden Answer’s Youtube channel which are vlog style videos focused on a variety of vegetable garden, cut flower garden, and general landscaping projects.
Niki Jabour’s Instagram and also her book The Year-round Vegetable Gardener (by Storey Books) has been a helpful resource. She grows so many varieties of veggies, it’s helpful to see what exists out there. She has also helped me think more about maximizing yields with seeding indoors, succession planting, and inter-planting.


